How to Set Up a Cat-Friendly Home With Vertical Space
Build a safer cat friendly home setup with secure shelves, stable cat trees, easy climbing routes, and cozy elevated retreats.
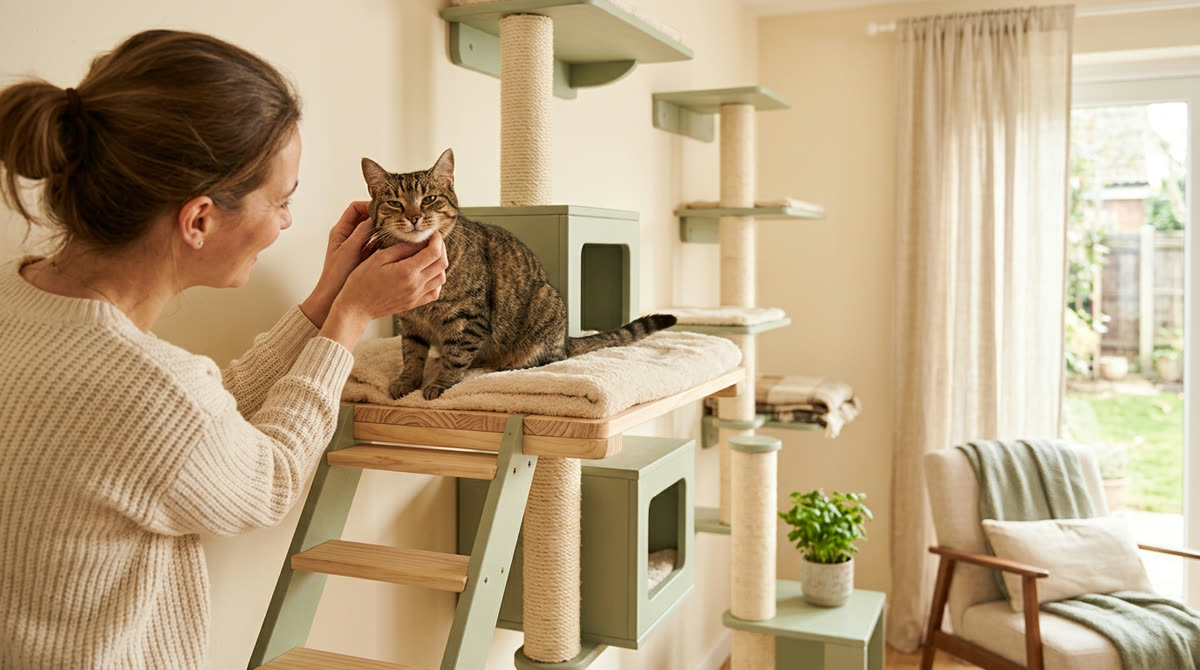
A calm, safety-first approachThis guide provides general education. Contact your veterinarian when symptoms are painful, persistent, or unusual.
- 1
Map Your Cat’s Habits and Your Home
Start your cat friendly home setup by watching where your cat climbs, naps, scratches, and retreats during two or three ordinary days. Sketch the room and mark favorite windows, busy walkways, existing furniture, feeding stations, litter boxes, and places where another pet could block access. Choose vertical-space locations that let your cat observe household activity without sitting directly over a doorway, beside a slamming door, or within reach of a ceiling fan. For a first project, plan one complete route in a frequently used room rather than installing isolated shelves throughout the house. A useful route might connect a low platform to a stable cat tree and then to a resting shelf, with a straightforward way back down. Account for age, body size, confidence, and mobility: kittens need close supervision, while older cats or cats with known movement limitations may need broad ramps and very low steps instead of jumps. If your cat has recently stopped jumping, hesitates unexpectedly, or seems painful when climbing, pause the project and contact your veterinarian rather than assuming more practice will solve the problem.
- Observe climbing and resting preferences for two or three days.
- Mark windows, doors, fans, and potential escape hazards.
- Choose one room for the initial climbing route.
- Identify an easy ascent and descent.
Good to know: Vertical space is an option, not a requirement to climb high. A low, accessible perch can offer the same sense of security as a tall shelf.
- 2
Choose Stable Trees and Generous Platforms
Select equipment around your cat’s full adult size, not just the dimensions that look tidy against the wall. As a starting point for an average adult cat, look for resting platforms about 16 by 20 inches or larger, then check that your particular cat can lie down and turn around without balancing along an edge. Large cats may need substantially bigger beds, and narrow connecting shelves should never be mistaken for comfortable sleeping platforms. Choose cat trees with wide, heavy bases, rigid posts, securely attached platforms, and replaceable scratching surfaces such as sisal; avoid lightweight towers that rock during an ordinary ascent. Check the manufacturer’s weight limits for individual shelves and the whole structure, remembering that two cats may occupy the same platform and that jumping creates more force than sitting still. Before buying wall-mounted products, confirm that their mounting instructions match your wall construction and that suitable hardware is included or clearly specified. In a rental, favor a manufacturer-approved, properly stabilized freestanding option if drilling is prohibited, rather than treating adhesive-mounted shelves as a safe substitute.
- Measure your cat’s relaxed resting footprint.
- Check both platform and overall weight limits.
- Choose washable or replaceable surface coverings.
- Read mounting and stabilization instructions before purchasing.
Good to know: A taller tree is not automatically a better tree. A lower, rigid structure with spacious platforms is preferable to a high tower that sways.
- 3
Design a Continuous, Accessible Climbing Route
Lay out the entire route with painter’s tape on the wall before making holes, including the approach from the floor and the final descent. For a cautious, otherwise mobile adult cat, an initial vertical rise of roughly 8 to 12 inches between broad steps can be a useful trial layout, but reduce that distance whenever your cat needs easier access. These measurements are planning examples rather than jumping targets, and no shelf arrangement should require your cat to perform its maximum leap. Offset platforms so your cat can see and reach the next landing, avoiding layouts where an overhead shelf blocks the head or forces a twisting jump. Place a roomy resting platform after every two or three transitions so the route includes places to pause, turn, and assess what is ahead. For cats that benefit from ramps, choose rigid, securely fixed designs with shallow slopes and grippy surfaces, testing a short, low version before attempting an elevated connection. In multi-cat homes, provide a second usable approach or descent wherever possible so one cat cannot trap another on a high perch or inside an elevated cubby.
- Mark every platform before drilling.
- Keep landings visible and unobstructed.
- Include broad turning and resting spots.
- Plan an alternative exit in shared climbing areas.
Good to know: Descent often needs more care than ascent. If your cat can climb up but cannot return comfortably, the route is not finished.
- 4
Install and Secure Every Component
Follow each product’s installation instructions exactly, using the specified brackets, fasteners, number of attachment points, and compatible wall materials. Wall studs or suitable masonry fixings are often needed for climbing shelves, while ordinary picture hooks, adhesive strips, and improvised drywall attachments are not appropriate substitutes. Use a level, tape measure, and suitable wall scanner, and have a qualified installer handle the job if you cannot confidently identify the wall construction or avoid concealed wiring and plumbing. Position a cat tree on a flat, firm surface and fit any supplied anti-tip restraint to an appropriate anchor point, rather than assuming that placing the tower in a corner makes it stable. Keep cats out of the work area while drilling, then remove screws, packaging, dust, and loose fibers before allowing access. Inspect each attachment and apply controlled hand pressure in several directions to look for movement, while recognizing that this check does not prove a shelf’s load capacity or replace correct installation. If anything shifts, creaks unexpectedly, pulls away from the wall, or leaves you uncertain about its strength, block access and correct the installation before your cat uses it.
- Use all manufacturer-specified attachment points.
- Check level, bracket fit, and platform stability.
- Install required anti-tip restraints.
- Clear hardware and debris from the room.
Good to know: Never test a cat shelf by standing or sitting on it. Your body weight may exceed its rating, damage the installation, and create a fall hazard.
- 5
Add Traction and Remove Nearby Hazards
Cover takeoff and landing areas with securely attached, low-pile carpet, firmly fitted sisal, or thin nonslip pads designed for pet furniture. Keep coverings flat and fully supported, because curling corners, loose blankets, and unsecured cushions can slide beneath a cat’s paws during a turn or descent. Run your hands over edges and fasteners to find splinters, protruding screws, sharp staples, or gaps that could catch a paw, collar, or claw. Check the space above and beside each perch, removing dangling blind cords, electrical cables, unstable decorations, toxic plants, and access to hot surfaces. Treat window perches as potential escape points: do not rely on an ordinary insect screen to prevent a fall, and keep unsafe windows securely closed or fitted with a suitable protective system. Prevent access to open tilt-style windows, balconies, and gaps behind furniture where a climbing cat could become trapped, even if the route itself feels sturdy. Avoid elevated toys with long strings, loops, or elastic attachments that remain accessible without supervision, and leave the floor-level landing area free of sharp-edged objects.
- Secure every mat, pad, and cushion.
- Remove cords, loops, and dangling strings.
- Check windows and nearby escape routes.
- Clear hard or sharp objects from landing areas.
Good to know: A soft rug below a perch may improve floor traction, but it cannot make a dangerous height or unstable installation safe.
- 6
Create Comfortable Perches With Clear Purposes
Give each elevated area a reason to exist by combining an observation perch, a quiet resting spot, and an accessible scratching surface along the route. Position an observation shelf where your cat can watch the room or a securely closed window without being crowded by constant foot traffic. Check that window spot in the morning and afternoon before adding bedding, since direct sun can turn a pleasant lookout into an uncomfortable hot spot. Use a thin, washable pad that fastens securely, and choose a platform large enough for the cat to stretch or curl up without bedding spilling over the edge. An elevated hideaway can suit a cat that prefers cover, but in a multi-cat household an open-sided bed or shelter with two usable exits is less likely to become a place where one cat gets cornered. Keep scratching posts within easy reach of the route and secure enough for a full-body stretch without wobbling, which helps make the new area more useful than nearby curtains or upholstery. Continue providing accessible food, water, litter boxes, and ground-level resting places, because vertical enrichment should expand your cat’s choices rather than make essential resources dependent on climbing.
Good to know: Place a familiar-smelling washable cloth on the new bed, securing it so it cannot slip. Familiar scent can make an unfamiliar perch more inviting without adding strong fragrances.
- 7
Introduce the Route at Your Cat’s Pace
Let your cat inspect the completed setup from the floor first, with household noise low and other pets kept from crowding the approach. During the first few days, offer one or two supervised sessions lasting about 3 to 5 minutes, ending sooner if your cat walks away or loses interest. Place a small treat on the lowest platform or guide a wand toy slowly toward an easy landing, then reward a voluntary step rather than trying to trigger a dramatic leap. Keep any food rewards within your cat’s normal daily allowance, and put wand toys away after the session so strings are not left hanging from the furniture. Never place a reluctant cat on the highest shelf, chase them upward, or withhold access to the floor to make them explore. Watch at least one comfortable ascent and descent before encouraging access to the next section, adjusting spacing or traction if your cat reaches awkwardly, slips, or repeatedly backs away. Some cats explore immediately while others need days or weeks, so measure progress by relaxed, voluntary use rather than by how quickly every shelf becomes occupied.
Good to know: If your cat freezes on a perch, stop coaxing and make the descent easier with a stable, already-secured intermediate step. Avoid startling or grabbing a frightened cat at height.
- 8
Troubleshoot Avoidance and Multi-Cat Tension
If your cat ignores the new vertical space for a week or two, change one feature at a time so you can identify what improves their confidence. Start with the approach: move a noisy appliance away, add a lower entry step, widen a cramped landing, or relocate a freestanding tree closer to a place your cat already enjoys. If your cat climbs up but hesitates on the way down, temporarily close the higher section and revise the lower route rather than repeatedly encouraging a jump to the floor. Watch for staring, chasing, doorway guarding, or one cat waiting beneath another’s perch, because a technically accessible structure may still feel unsafe in a shared home. Add a separate climbing station in another part of the room or another room, and create routes that do not require cats to pass nose-to-nose through a narrow connection. Stop access immediately after a fall or repeated slipping, and contact your veterinarian if your cat shows limping, pain, unusual withdrawal, or a new reluctance to move; difficulty breathing, collapse, or inability to stand warrants emergency veterinary care. Seek veterinary advice after a significant fall even if your cat initially seems normal, and ask for help from a qualified feline behavior professional if conflict persists after environmental changes.
- Change one layout feature at a time.
- Check the descent, not just the climb.
- Watch for resource guarding and blocked exits.
- Block unsafe sections until repairs are complete.
Good to know: Do not punish hissing or force cats to share a perch. Increase distance and provide alternatives so each cat can choose a safe resting place.
- 9
Inspect, Clean, and Adapt the Setup
For the first week, check the installation daily for movement, shifting mats, loose fasteners, and signs that your cat is catching claws on the covering. After that, perform a hands-on inspection weekly and after any unusually forceful jump, household move, or incident that shakes the structure. Tighten hardware only as directed by the manufacturer, replace damaged parts promptly, and close the route if a bracket bends, a platform cracks, or an anchor begins to pull out. Vacuum platforms and scratching surfaces about once a week, and wash removable bedding according to its care label using a mild, fragrance-free detergent when suitable for the material. Let cleaned surfaces dry completely before reopening access, and avoid adding essential oils or strongly scented sprays to make the climbing area smell fresh. Reassess the layout every few months and whenever your cat’s size, mobility, or household relationships change, lowering platforms or adding easier transitions before access becomes frustrating. A successful cat-friendly home with vertical space remains stable, clean, and optional, giving your cat dependable places to climb, rest, scratch, and observe throughout every life stage.
- Inspect daily during the first week, then weekly.
- Wash bedding and vacuum accumulated fur.
- Replace frayed coverings and damaged hardware.
- Review accessibility as your cat ages.
Good to know: Keep the assembly instructions and spare hardware in a labeled bag. A monthly photo of brackets and platforms can also help you notice gradual sagging or separation.



Ask about this guide
Leave a comment or a question about your own pet and the Pawlito assistant replies right away with practical next steps.