How to Harness Train a Cat for Outdoor Walks
Help your cat feel safe in a harness with gradual indoor practice, gentle outdoor introductions and a calm, cat-led approach.
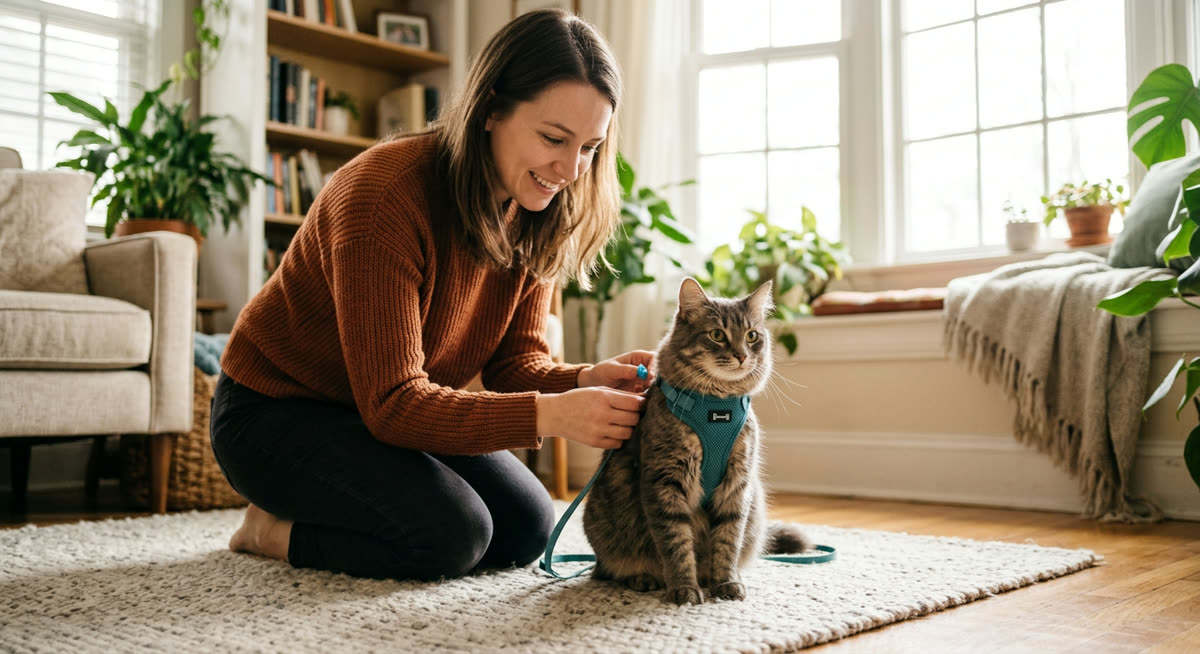
A calm, safety-first approachThis guide provides general education. Contact your veterinarian when symptoms are painful, persistent, or unusual.
- 1
1. Decide whether outdoor walks suit your cat
Start by considering how your cat responds to unfamiliar sounds, people and places, rather than assuming they will enjoy walks. A cat who explores confidently and recovers quickly from small surprises may find training easier than one who hides whenever a door opens. Choose a quiet room for early practice, and plan sessions when your cat is awake, relaxed and interested in food or play. Before going outdoors, contact your vet to discuss suitable vaccination and parasite protection, along with any age or health considerations. Check that your cat’s microchip registration and contact details are up to date in case they escape. If your cat consistently finds the process distressing, choose indoor enrichment or a secure outdoor enclosure instead of pushing ahead.
- Choose a quiet training room
- Identify favourite small treats
- Check microchip contact details
- Discuss outdoor readiness with your vet
Good to know: Measure progress by your cat’s comfort, not by how quickly you reach the garden.
- 2
2. Choose and check your walking equipment
Choose an adjustable harness designed for cats, using the manufacturer’s neck and chest measurements rather than selecting by weight alone. Look for secure fastenings, smooth edges and a shape that leaves the throat free of pressure and allows the front legs to move naturally. Pair it with a lightweight, fixed-length lead that gives you close control without a heavy clip pulling on the harness. Never attach a walking lead to your cat’s collar, and avoid retractable leads because sudden distance changes make escapes and tangles harder to manage. Prepare a secure carrier as a familiar retreat, and leave it accessible indoors with comfortable bedding before your first outing. Inspect the harness, lead and carrier for loose stitching, damaged clips or faulty closures before every use.
- Adjustable cat-specific harness
- Lightweight fixed-length lead
- Secure, familiar carrier
- Small treats in an accessible pouch
- Current identification details
Good to know: No harness is escape-proof, so secure fit and calm lead handling matter more than product claims.
- 3
3. Build a positive association with the harness
Place the harness on the floor at a comfortable distance and let your cat investigate without moving it towards them. Reward a voluntary glance, sniff or approach with a small treat, gentle praise or a brief game, depending on what your cat enjoys. Keep these first sessions to around one or two minutes, ending while your cat is still relaxed and engaged. Once they approach comfortably, lift the harness briefly, reward calm behaviour and put it down again. Introduce fastening sounds quietly at a distance, then progress to briefly touching the harness against a shoulder or side. If your cat retreats, crouches or stops taking treats they normally want, increase the distance or return to an easier stage.
Good to know: Practise before a usual meal if your cat is interested, but never withhold food to make them cooperate.
- 4
4. Practise wearing the harness indoors
With exterior doors and windows secured, fit the harness for just a few seconds while your cat remains free to stand or move away between attempts. If the design goes over the head, reward your cat for voluntarily moving their nose towards and through the opening rather than forcing it over their face. Adjust the straps according to the manufacturer’s instructions, making the harness snug without restricting breathing, swallowing or normal movement. Use the stated finger-clearance guidance as a starting point, then check that the harness cannot slide over the head or allow an elbow to slip inside a strap during gentle movement. Offer a treat or a familiar toy, remove the harness while your cat is comfortable and gradually build towards several minutes of relaxed wear. If your cat freezes, flops over or walks unusually, do not drag them or assume they will get used to it; shorten the session and revisit the previous stage.
- Fastenings fully secured
- Straps clear of the throat
- Front legs moving freely
- No rubbing behind the elbows
- No obvious route for slipping out
Good to know: Photograph the successful strap settings so you can spot accidental changes before the next session.
- 5
5. Introduce the lead and practise following
Attach the lead indoors once your cat can walk, play and take rewards comfortably in the harness. Hold the handle throughout practice, keeping a loose curve in the lead and preventing it from wrapping around furniture or legs. Follow your cat initially so they learn that the lead does not mean being pulled or restrained without warning. Next, invite them to take one or two steps towards you with a treat, familiar cue or toy, and reward them when they arrive. Practise gentle changes of direction by moving yourself and offering a reward, rather than tugging on the lead. Never leave a harnessed or leashed cat unattended, and remove both items when the session ends.
Good to know: Teach a simple cue such as “this way” indoors so it becomes familiar before you need it outside.
- 6
6. Plan a safe route to your first outdoor spot
Choose a quiet, sheltered place close to home, ideally a private garden away from roads, dogs and busy footpaths. Inspect it for gaps, sharp objects, toxic plants, recently applied garden chemicals and places where a lead could snag. Avoid extreme temperatures, strong winds and any surface that feels uncomfortably hot or cold to your hand. Fit and check the harness indoors, then place your cat in their carrier for the journey to the chosen spot, keeping the lead safely contained so it cannot catch in the door. Set the carrier on stable ground, take hold of the lead before your cat can emerge and open the door only when the surroundings are calm. Let your cat decide whether to come out, keeping the carrier available as a retreat and returning indoors if they prefer to stay inside.
- Quiet location with an easy return route
- No nearby dogs or moving traffic
- Comfortable weather and ground temperature
- No chemical or plant hazards
- Carrier positioned as a safe retreat
- 7
7. Keep the first outings short and cat-led
For the first few outings, aim for a few calm minutes of sniffing or sitting rather than travelling any particular distance. Stay close enough to manage the lead while leaving slack, and move with your cat instead of steering them like a dog. Allow pauses to watch and listen, but prevent access to unknown plants, puddles, wildlife and narrow gaps. Watch for a loose posture, curious sniffing and the ability to respond to familiar rewards before offering a little more exploration. Finish while your cat is still comfortable, inviting them back into the carrier with a familiar cue or reward. Increase time or explore a slightly larger area only after repeated relaxed outings, changing one element at a time.
- Keep the lead loose
- Allow sniffing and quiet pauses
- Maintain distance from other animals
- Keep the carrier within easy reach
- End before your cat becomes overwhelmed
Good to know: A successful outing can be five minutes beside the carrier with no actual walking.
- 8
8. Respond calmly to fear, backing out or refusal
End the outing if your cat stays crouched, pins their ears back, lashes their tail, repeatedly tries to flee or becomes unable to engage with you. If they start backing out of the harness, move with them to reduce lead tension while preventing them from reaching hazards, rather than pulling forwards against their retreat. Lower yourself calmly, bring the carrier close and encourage them inside without chasing, cornering or grabbing at them. If a dog or another threat approaches, ask the owner to keep away and use distance or a solid barrier while you help your cat into the carrier. Once safely indoors, check the harness fit and return to an easier training stage instead of repeating the difficult situation immediately. Stop training and contact your vet promptly for signs of pain, breathing difficulty or unusual lethargy, and seek urgent veterinary advice if open-mouth breathing persists or your cat collapses.
Good to know: If an outing goes badly, make the next session a short, easy indoor exercise rather than another outdoor attempt.
- 9
9. Check your cat afterwards and maintain the routine
Once indoors with doors and windows secured, remove the lead and harness and offer fresh water and a quiet resting place. Gently check the paws, coat, armpits and areas beneath the straps for debris, ticks, redness or rubbing, stopping if handling causes discomfort. Contact your vet if you find an injury, persistent skin irritation or an attached tick you are unsure how to remove safely. Wipe dirt from the equipment, follow its cleaning instructions and let it dry fully before storing it out of reach. Note the outing’s length, location and any worrying triggers so you can choose an easier or similarly calm session next time. Keep rewarding relaxed harness wear indoors between outings, and pause outdoor walks if your cat stops enjoying them.
- Remove all walking equipment
- Check paws, coat and strap contact points
- Offer water and quiet rest
- Clean and inspect the equipment
- Record useful training observations
Good to know: Recheck harness fit regularly, especially while your cat is growing or if their weight changes.



Ask about this guide
Leave a comment or a question about your own pet and the Pawlito assistant replies right away with practical next steps.