How to Litter Train a Kitten in a Few Days
Make litter training a kitten easier with a practical few-day plan for box setup, positive reinforcement, accident cleanup, and lasting habits.
A calm, safety-first approachThis guide provides general education. Contact your veterinarian when symptoms are painful, persistent, or unusual.
- 1
Check Your Kitten’s Readiness and Set a Realistic Timeline
Litter training a kitten can move quickly because many kittens naturally seek loose material for toileting, but a few days should be treated as a learning window rather than a guaranteed deadline. Most kittens begin learning to use a shallow litter tray around 3–4 weeks of age, while younger orphaned kittens may still need caregiver help to eliminate and require guidance from a veterinarian or experienced neonatal foster. For a weaned kitten coming into your home, use the first day to establish a comfortable setup, the next 2–3 days to build a predictable routine, and subsequent days to confirm independent use. Ask the previous caregiver which litter, tray style, and location the kitten already knows, since keeping familiar features often prevents an unnecessary restart. Before training, check that your kitten is eating, moving comfortably, and passing urine and stool without obvious distress; discomfort can make an otherwise suitable box difficult to use. Arrange a new-kitten veterinary visit soon after adoption, bringing any available medical and deworming records rather than assuming accidents are simply a training issue. Keep a brief phone log of meals, naps, successful box visits, and accidents for the first 3–5 days so you can identify patterns without repeatedly interrupting your kitten.
- Confirm the kitten’s age and previous toileting routine.
- Ask for the name and texture of the familiar litter.
- Note appetite, energy, and comfortable elimination.
- Start a simple daily toileting log.
Good to know: Repeated straining, crying while trying to urinate, or repeated attempts that produce little or no urine require immediate veterinary attention. Do not wait for the training plan to work.
- 2
Prepare a Small, Calm Training Area
For the first 24–48 hours, make one quiet, kitten-proofed room your kitten’s home base instead of offering immediate access to the entire house. A spare room or safely arranged bathroom can work, provided it has a comfortable temperature, a closed toilet lid, secure windows, and no reachable cords, cleaners, or gaps behind appliances. Place the litter tray on a level, easy-to-clean surface where your kitten can reach it without climbing stairs, squeezing through barriers, or passing another pet. Keep food, water, bedding, and a hiding place on the opposite side of the room, several feet from the tray where space allows, because cats generally prefer separate eating, resting, and toileting areas. Choose a quiet corner with an open approach rather than a location beside a washing machine, slamming door, or other source of sudden noise. Spend time there offering gentle play and companionship, and provide constant access to drinking water rather than limiting fluids to reduce accidents. During sleep or necessary unsupervised periods, keep the kitten in this comfortable home base with litter access, but never use a carrier or cramped crate as a substitute for an adequately equipped room.
- Secure chemicals, cords, windows, and appliance gaps.
- Separate the tray from food, water, and bedding.
- Provide a bed, safe toys, and a hiding spot.
- Keep the route to the box open day and night.
Good to know: Avoid placing the tray where another cat or a curious dog can corner the kitten. A safe approach and exit matter as much as the litter itself.
- 3
Choose an Accessible Box and Kitten-Suitable Litter
Start with an uncovered tray that has an entrance roughly 2–3 inches high, or lower if your kitten cannot step over it easily, and enough floor space to turn around and dig without crowding. Aim for a tray about 1½ times the kitten’s body length from nose to the base of the tail, then replace it with a larger box as the kitten grows. Add approximately 1–2 inches of unscented litter initially, creating a shallow digging surface rather than a deep layer that feels unstable under small paws. If your kitten already uses a particular litter comfortably, keep that product at first; otherwise, choose an unscented, low-dust option and monitor how the kitten interacts with it. For very young kittens or kittens that mouth litter, an unscented non-clumping product is a cautious starting choice, although no litter is intended to be eaten and persistent ingestion warrants veterinary advice. Avoid scented deodorizers, plastic liners, and covered boxes during the initial learning period because strong smells, snagging claws, or enclosed entrances can discourage exploration. For one kitten, plan on two accessible boxes as space expands, and in a multi-cat household use the general guideline of one box per cat plus one extra, distributed across separate locations.
- Low entrance and room to turn comfortably.
- Uncovered design with a stable base.
- Unscented, low-dust litter in a shallow layer.
- Additional boxes in separate accessible locations.
Good to know: Use a simple manual tray during early training. Automatic litter boxes may have minimum age and weight requirements, and their movement or noise can frighten a small kitten.
- 4
Introduce the Tray at Predictable Moments
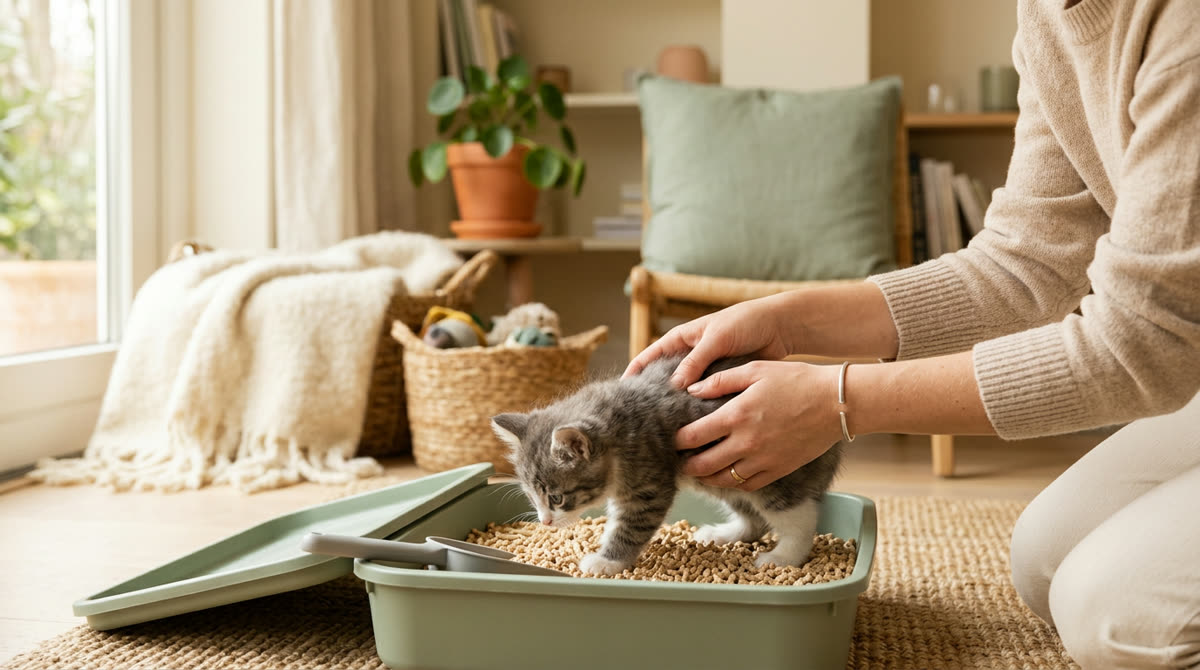
Once your kitten has had a little time to settle, gently place them in the tray for a brief introduction and allow them to sniff, turn around, or leave without restraint. Repeat this invitation immediately after waking, about 5–15 minutes after meals, and after active play, since these moments are useful opportunities to catch a natural need to eliminate. During the first couple of days, also offer a calm tray visit roughly every 1–2 hours while the kitten is awake, adjusting the schedule to the patterns in your log rather than treating the interval as a bladder limit. Watch for floor-sniffing, circling, crouching, or scratching at a corner, and guide the kitten toward the nearest box before they settle into a toileting posture. If they have already begun eliminating, do not startle or abruptly scoop them up; let them finish and address the location afterward. If a tray visit produces nothing after a minute or two and the kitten wants to leave, let them go instead of repeatedly putting them back or holding them inside. You may lightly scratch the litter with your own finger to draw attention to the texture, but never grab the kitten’s paws to demonstrate digging, because forced handling can make the tray feel unsafe.
- Offer a visit after waking.
- Try again 5–15 minutes after meals.
- Include a visit after energetic play.
- Respond early to sniffing, circling, or crouching.
Good to know: Do not wake a comfortably sleeping kitten just to practice. An accessible nearby tray and well-timed invitations while awake are more useful than constant handling.
- 5
Reward Success Without Interrupting Toileting
When your kitten uses the litter tray, stay quiet and give them enough space to finish urinating or defecating, cover the waste if they choose, and step out on their own. Within a few seconds of their exit, offer gentle praise and, if the kitten enjoys food rewards, one tiny kitten-appropriate treat or a piece of their usual food. Deliver the reward a short distance away from the tray rather than placing food inside it, so the kitten can keep toileting and eating areas separate. Keep treats below 10 percent of daily calories, and use a little of the normal food allowance when rewarding several successful visits throughout the day. Reward independent trips as well as successful visits you prompted, because the long-term goal is for your kitten to find and use the box without being carried there. Never shout, spray water, rub the kitten’s nose in an accident, or shut them in the tray, since punishment can create fear of toileting near you without teaching the desired location. As independent use becomes more reliable over several days, gradually reduce food rewards while maintaining a calm response and the same convenient box setup.
Good to know: Some kittens prefer quiet praise or a brief play session to petting or treats. Choose a reward your kitten genuinely enjoys, and avoid excited celebrations that could startle them.
- 6
Clean Accidents and Troubleshoot the Cause
If an accident happens, calmly move the kitten away from the cleanup area, blot fresh urine or lift solid waste, and apply a pet-urine enzymatic cleaner that is suitable for the affected surface. Follow the label’s application, contact-time, and drying directions, treating the full soiled area and any underlying padding the product is designed to reach, because lingering odor can encourage a return visit. Avoid ammonia-based cleaners and never mix cleaning products; keep the kitten off the treated area until the label says it is safe. Review the preceding hour in your log and check whether the tray was dirty, too far away, difficult to enter, unexpectedly noisy, or guarded by another animal. If the kitten repeatedly chooses one particular corner, temporarily place an additional tray there, and if they avoid the litter texture, offer a second identical tray with a different unscented substrate while leaving the familiar option available. Seek same-day veterinary advice for blood in urine or stool, repeated diarrhea, painful defecation, reduced appetite, lethargy, or an abrupt change in previously reliable habits, rather than trying to solve those signs solely by changing litter. Repeated urinary straining or little to no urine is an emergency, while persistent accidents without illness signs still deserve a veterinary call if they continue despite 48–72 hours of consistent, accessible setup.
- Use a surface-compatible enzymatic pet-urine cleaner.
- Check cleanliness, entry height, noise, and access.
- Add a tray at a repeatedly chosen accident spot.
- Change one setup variable at a time.
- Escalate discomfort or illness signs to a veterinarian.
Good to know: If your kitten licks or eats litter, interrupt access to that material and contact your veterinarian for advice on a safer setup. Suspected substantial ingestion, vomiting, or distress needs prompt veterinary assessment.
- 7
Expand Access Only After Consistent Success
Once your kitten has used the tray reliably for 24–48 hours without accidents and has made several independent trips, begin opening access to one additional room at a time. Treat this as a practical progression point rather than proof that training is complete, since excitement and unfamiliar surroundings can temporarily overwhelm a young kitten’s routine. Start with supervised exploration lasting about 15–30 minutes, keeping a nearby box available and offering a tray visit after play or before returning to the home base. Add a tray on each floor the kitten can access, and do not expect a small kitten to leave an exciting game, navigate stairs, and cross the house to reach the only box. Keep the original tray in place during expansion, because suddenly moving the familiar toilet while adding new territory changes two important cues at once. If an accident occurs, return temporarily to the last successful amount of space for another day or two, review tray placement, and restart with shorter supervised outings rather than treating the setback as disobedience. When a box eventually needs relocating, shift it only a small distance each day, such as 6–12 inches if the room allows, or establish a second box at the destination before removing the old one.
Good to know: Make sure doors cannot swing shut and block the route to a tray. Reliable access is especially important overnight and when nobody is home to notice a closed door.
- 8
Maintain Clean Boxes and Monitor Long-Term Habits
Scoop waste at least twice daily and remove obvious soiling promptly when possible, because a kitten may reject a tray that was acceptable just a few hours earlier. With non-clumping litter, scoop stool and fully replace the litter as often as the product instructions and level of wetness require, which may be daily or every few days during frequent use. Wash the emptied tray with mild, unscented soap and warm water at full changes, rinse thoroughly, and dry it before refilling so strong cleaning smells and damp residue do not alter the familiar surface. Check box size weekly while your kitten is growing, replacing the starter tray when turning, digging, or squatting becomes cramped while preserving an easy entrance. If you later change litter, make the transition gradually over roughly 7–10 days when the products are suitable for mixing, or offer old and new litters in separate trays so your kitten retains a comfortable choice. Continue noting unusual changes in urine output, stool consistency, frequency, or behavior, and contact your veterinarian when changes persist or accompany discomfort, appetite loss, or low energy. Successful litter training in a few days means establishing a dependable routine, not eliminating the need for follow-up, so maintain convenient boxes and watch for setbacks over the next several weeks.
- Scoop at least morning and evening.
- Replace wet or dirty litter promptly.
- Wash and thoroughly rinse trays at full changes.
- Recheck tray size as the kitten grows.
- Keep monitoring comfort and independent use.
Good to know: Wash your hands after handling litter or cleaning accidents, and keep young children away from used trays. Anyone who is pregnant or immunocompromised should have someone else handle litter duties when possible.



Ask about this guide
Leave a comment or a question about your own pet and the Pawlito assistant replies right away with practical next steps.