How to Trim a Cat's Claws Without Getting Scratched
Make trimming cat claws calmer and safer with gentle handling, precise clipping, and practical ways to prevent scratches.
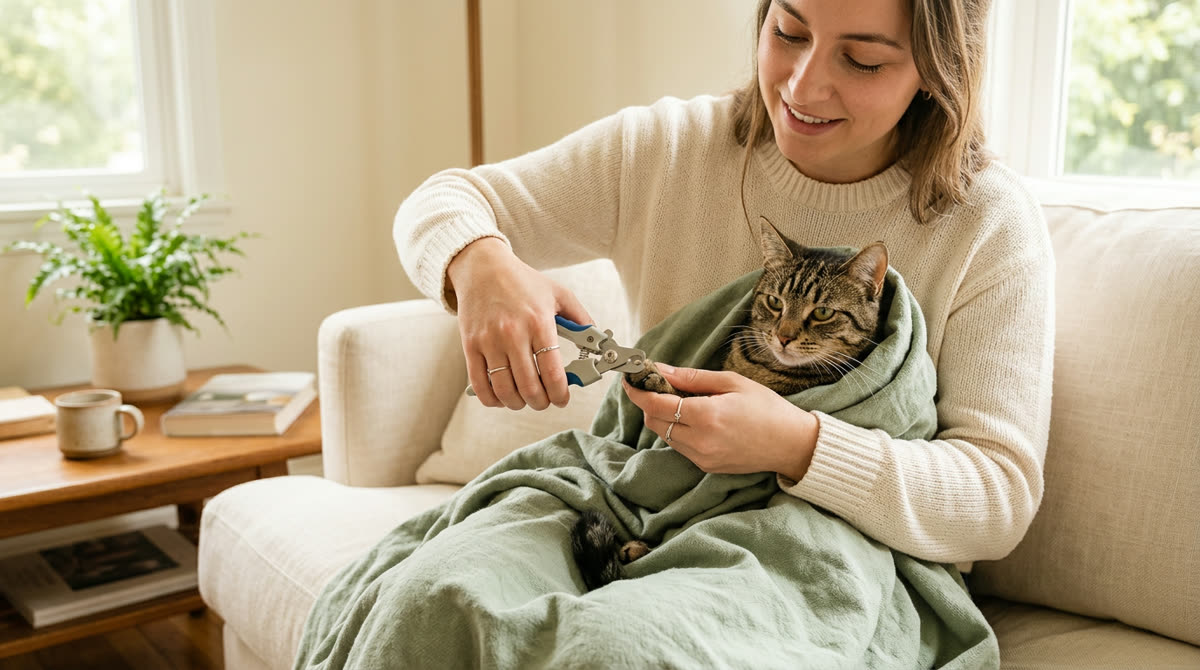
A calm, safety-first approachThis guide provides general education. Contact your veterinarian when symptoms are painful, persistent, or unusual.
- 1
Check Your Cat’s Claws and Comfort Level
Before trimming cat claws, spend 1–2 minutes watching how your cat walks, then look at the paws while your cat is resting comfortably beside you. A routine home trim is appropriate for healthy claws that have become needle-sharp or catch on blankets, but limping, swelling, discharge, or an unusually painful reaction calls for a veterinarian rather than a grooming session. Check the dewclaws—the higher claws on the inner side of the front legs—because they do not contact the floor normally and can become overgrown unnoticed. If a claw curves into or presses against a paw pad, stop and arrange prompt veterinary care; cutting it yourself could leave a wound or worsen pain. Most cats have 18 claws, with five on each front foot and four on each back foot, although extra-toed cats need a careful inspection for additional, sometimes partly hidden claws. For a cat with a history of biting, panic during restraint, or painful joints, ask your veterinary team about a low-stress nail-trimming appointment before attempting the job at home. Your first goal is to establish that your cat can comfortably tolerate paw handling, not to finish every claw in one sitting.
- Check for limping, swelling, or broken claws.
- Inspect front dewclaws and any extra toes.
- Look for claws pressing toward the pads.
- Note previous biting or handling difficulties.
Good to know: A sudden dislike of paw handling can signal pain, even in a normally tolerant cat; do not assume your cat is simply being difficult.
- 2
Set Up a Scratch-Safe Trimming Station
Gather everything before bringing your cat over so you never have to hold a paw while reaching into a drawer. Choose sharp, cat-sized scissor-style nail clippers or another small pet clipper you can control precisely; oversized dog clippers obscure the tip, while dull blades can crush or splinter the claw. Keep pet nail styptic powder labeled for use on cats, clean gauze, a towel, and several tiny treats within arm’s reach in case you need to reward cooperation or manage a minor nick. Work under a bright lamp that illuminates the claw from the side without shining directly into your cat’s eyes, since clear visibility is essential for avoiding the quick. Sit on the floor or use a stable, low surface with a nonslip mat, rather than an elevated counter from which a startled cat could jump or fall. Close the room to other pets and loud activity, but leave your cat a safe place to retreat instead of cornering them behind furniture. Long sleeves may offer limited protection from an accidental scrape, but bulky gloves reduce dexterity and should never be used to justify continuing with a struggling cat.
- Sharp, cat-sized nail clippers
- Bright, adjustable lighting
- Cat-safe pet nail styptic powder and gauze
- Nonslip towel or mat
- Tiny treats or a lickable cat treat
Good to know: An electric nail grinder is not automatically easier: its noise and vibration require separate training, so it is usually a poor shortcut for a clipper-shy cat.
- 3
Teach Your Cat to Accept Paw Handling
Choose a naturally relaxed time, such as after a nap, or offer 5–10 minutes of gentle play followed by a quiet settling period before you begin. Start with a 30–60-second practice session in which you touch a shoulder or leg, give a tiny treat, and stop before your cat pulls away. Gradually progress to touching the top of a paw for 1 second, supporting it briefly, and gently pressing a toe to expose a claw, rewarding each accepted step. Practice once or twice daily over several days if necessary, moving forward only when your cat stays relaxed rather than merely enduring the contact. Introduce the clippers separately by letting your cat investigate them at a comfortable distance, then pair a quiet opening-and-closing movement with a treat. Flattened ears, a lashing tail, skin twitching, freezing, or turning sharply toward your hand mean you should pause and make the next practice easier. Avoid holding the paw until your cat “gives up,” because forced handling can teach them that scratching is the only reliable way to escape.
- Brief leg touch, then reward
- Brief paw support, then reward
- Gentle claw extension, then reward
- Clipper introduction without cutting
Good to know: The best scratch-prevention tool is stopping before the swat: reward calm cooperation while your cat still feels free to disengage.
- 4
Choose a Gentle, Stable Hold
Try letting your cat sit beside you or on your lap facing away, with their body supported and the paw resting close to its natural position. Keep your face away from the mouth and front feet, and avoid leaning over the cat, which can make an otherwise gentle approach feel trapping. If a helper is available, have one person offer a lickable treat and loosely support the body while the other handles the paw and clippers. The helper should not pin the shoulders, squeeze the chest, or grip the legs; if cooperation requires increasing force, the session should end. For a cat that already finds towels comforting, a loose towel draped around the body can keep unused paws contained, provided the head stays uncovered and breathing and movement are not restricted. Do not scruff your cat, force them onto their back, or pull a limb straight out to gain access, because these positions may trigger pain, fear, and defensive scratching. Spend 10–20 seconds checking that the position remains comfortable before picking up the clippers, and release your cat if they start twisting, kicking, or trying repeatedly to leave.
Good to know: A towel is optional, not a requirement; skip it if your cat stiffens, struggles, or becomes more frightened when wrapped.
- 5
Expose the Claw and Locate the Quick
Support one paw gently, then place a fingertip beneath a toe and your thumb on top, using light opposing pressure to extend its claw. Work with one toe at a time instead of squeezing the entire paw, and keep surrounding fur clear of the cutting area without tugging on it. On a pale claw, look for the pink tissue inside the thicker base: this is the quick, which contains blood vessels and nerves and must not be cut. The removable portion is the narrow, clear, pointed hook beyond the quick, not the entire curved end of the claw. Plan to leave roughly 2 mm of visible claw beyond the quick when you can see that margin clearly; if doing so leaves very little to remove, a minimal tip trim is enough. With a dark or opaque claw, do not guess where the quick ends—remove only an unmistakably thin terminal point, or leave that claw for a veterinary professional if you cannot identify a safe cutting area. Check every claw independently, since quick length, claw thickness, and growth direction can differ even on the same paw.
- Extend only one claw at a time.
- Identify the pink quick when visible.
- Clear fur from the clipper opening.
- Choose a cut well beyond the quick.
Good to know: Never use another claw’s cut length as your template; an overgrown claw may also have a longer quick and cannot necessarily be shortened fully in one session.
- 6
Clip Only the Sharp Tip
Once you can see a safe cutting line, place only the narrow tip between the clipper blades and confirm that no pad, fur, or nearby toe is inside the opening. For many cats, removing about 1–2 mm from the very end is sufficient to blunt the needle point, but visibility of the quick—not a fixed measurement—must determine the limit. Position the blades so they cut across the claw cleanly, rather than running lengthwise toward its base, and keep the tool clear of the paw pad. Close the clippers with one smooth, decisive motion while the paw is still, without twisting or pulling the claw. Release the toe immediately afterward and offer a reward, even if that single clip is all you accomplish during the session. If the claw moves before you squeeze, withdraw the clippers and reset instead of chasing the paw or trying to finish the cut mid-struggle. A thin, flaky outer sheath can be normal, but stop if the claw cracks into the thicker portion, bleeds, or causes a painful reaction, and contact your veterinarian for an injured or persistently tender claw.
Good to know: You are blunting a sharp point, not trying to make the claw short like a human fingernail; conservative cuts reduce both discomfort and future resistance.
- 7
Work in Short Sessions and Check Every Foot
For a first successful trim, aim for just one or two claws in a session lasting about 1–3 minutes, then let your cat leave while still calm. A cat already comfortable with the process may tolerate one paw at a time, but there is no need to complete all four feet on the same day. Note which claws you have finished on a phone checklist so you do not repeatedly handle or accidentally re-trim the same toes during later sessions. Include the front dewclaws, gently changing your viewing angle rather than rotating the leg into an awkward position to reach them. Inspect the back claws as well, but trim only those that need it; they are often less needle-sharp than the front claws and may require less frequent attention. Support a hind paw close to the body and stop at the first kicking motion, since pulling against the leg can escalate the struggle and expose your hands or arms to scratches. End each small batch with a treat or another reward your cat enjoys, and return later that day or on another day only if they are relaxed again.
- Start with one or two successful clips.
- Record completed toes.
- Remember front dewclaws.
- Check, rather than automatically trim, back claws.
- Finish before your cat becomes restless.
- 8
Stop Safely for Struggling or Bleeding
If your cat growls, swats, tries to bite, or struggles to escape, put the clippers down, release the restraint safely, and end the session rather than punishing or immediately trying again. Return to easier handling practice on another day, and arrange professional help if fear or defensive behavior repeatedly prevents a safe trim. If you nick the quick, stop clipping and hold clean gauze against the claw with gentle, steady pressure for 2–3 minutes without repeatedly lifting it to check. If minor oozing continues, use pet nail styptic powder labeled for cats according to its directions, keeping it away from the eyes and mouth. Contact a veterinarian if bleeding has not stopped within about 5 minutes, and seek urgent veterinary care sooner for heavy bleeding, a partly torn-off claw, severe pain, weakness, or breathing difficulty. Do not improvise with alcohol, hydrogen peroxide, household glue, tight bandages, or human pain medicine, and do not continue restraint if administering first aid puts either of you at risk. If you are scratched, wash the area promptly with soap and running water; seek medical advice for cat bites, deep wounds, eye injuries, or increasing redness, warmth, swelling, or pain.
Good to know: Open-mouth breathing or panting during restraint is a stop signal: release your cat safely and contact a veterinarian promptly, especially if it persists.
- 9
Reward, Monitor, and Build a Maintenance Routine
After trimming, let your cat retreat to a comfortable resting place and offer a small reward without following them around for more handling. Watch their next few steps for normal weight-bearing, and after any accidental nick, check for renewed bleeding once they have settled and periodically over the next 24 hours. Persistent licking of one toe, limping, swelling, discharge, or reluctance to use a paw warrants veterinary advice rather than another attempt to “tidy up” the claw. Clean the clippers according to the manufacturer’s instructions, dry them thoroughly, and store them closed where children and pets cannot reach them. Check claw length weekly and expect many indoor cats to benefit from trimming about every 2–4 weeks, adjusting the interval to actual sharpness, snagging, growth, and wear. Provide stable vertical and horizontal scratching surfaces because scratching supports normal stretching, scent marking, and shedding of outer claw layers, although it does not reliably replace trimming. Older cats, less active cats, and cats with extra toes may need closer monitoring, and consistently fearful cats are best served by a veterinary-guided handling plan rather than increasingly forceful home trims.
- Reward and allow quiet recovery.
- Watch for limping or repeated toe licking.
- Clean and dry the clippers.
- Check claws weekly.
- Keep suitable scratching surfaces available.
Good to know: Regular, tiny trims are usually easier than infrequent major trims; a successful routine is one your cat can tolerate safely, even if it takes several short sessions.



Ask about this guide
Leave a comment or a question about your own pet and the Pawlito assistant replies right away with practical next steps.