How to Brush a Dog's Teeth Without a Struggle
Make brushing a dog's teeth calmer with gentle training, the right tools, and a daily routine that builds trust while protecting oral health.
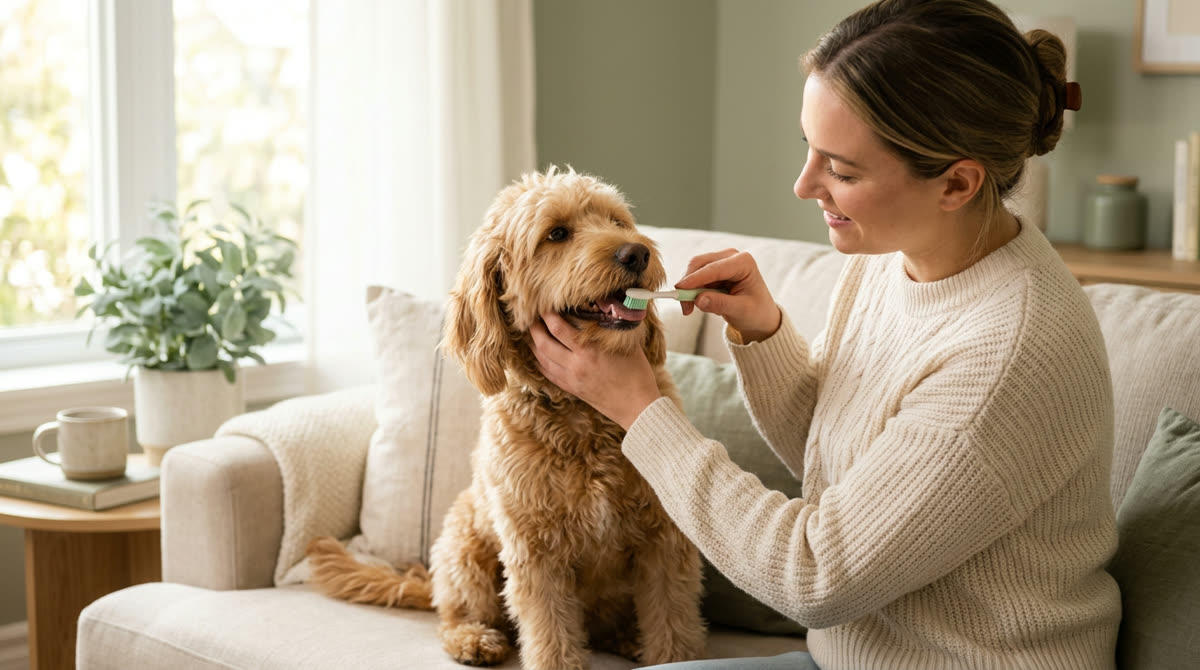
A calm, safety-first approachThis guide provides general education. Contact your veterinarian when symptoms are painful, persistent, or unusual.
- 1
Check for Pain Before You Begin
Before brushing a dog's teeth, watch your dog eat, yawn, and pick up a favorite toy, looking for signs that mouth handling might hurt rather than simply feel unfamiliar. If your dog is comfortable, gently lift one lip for a few seconds without opening the jaws, and look for red or swollen gums, broken teeth, bleeding, or thick yellow-brown deposits along the gumline. Persistent bad breath, drooling, dropping food, chewing on one side, or suddenly resisting facial touch are reasons to arrange a veterinary examination before starting or continuing a brushing program. Stop immediately if your dog yelps, pulls away sharply, or shows pain, and seek prompt veterinary care for facial swelling, significant bleeding, or difficulty eating; trouble breathing warrants emergency care. Even a mouth that looks fairly clean can have problems below the gumline, so home inspection cannot replace a veterinary oral examination. Brushing removes soft plaque but cannot safely remove hardened tartar, and trying to scrape deposits away with a metal dental tool can injure gums and tooth surfaces. If your dog has recently had dental treatment or extractions, ask the treating veterinarian exactly when and where brushing can resume rather than assuming the mouth is ready.
- Observe eating and chewing before touching the mouth.
- Lift the lip only if your dog remains comfortable.
- Report persistent odor, bleeding, or changes in chewing.
- Leave hardened tartar removal to veterinary professionals.
Good to know: A sudden struggle after previously accepting brushing deserves a veterinary check, not firmer restraint; a new aversion may reflect discomfort.
- 2
Choose Comfortable, Dog-Safe Supplies
Choose a soft-bristled dog toothbrush with a head small enough to sit against the outside of your dog's teeth without stretching the cheek or bumping the back of the mouth. A tiny pet brush suits many toy breeds, while a longer-handled brush can make the rear teeth easier to reach in larger dogs; softness and fit matter more than an elaborate design. A finger brush may feel less intimidating to some dogs, but it is often bulky in small mouths and puts your finger close to the teeth, so avoid it when your dog is likely to clamp down. Use toothpaste specifically labeled for dogs, selecting a flavor your dog willingly accepts rather than assuming a strong mint scent means better cleaning. Human toothpaste, products containing xylitol, baking soda mixtures, and human mouthwash are inappropriate choices because dogs swallow dental products and some ingredients can cause harm. Set out the brush, toothpaste, a non-slip mat, and 8–12 tiny rewards before bringing your dog over, using part of the usual food allowance when possible to limit extra calories. If your dog has food allergies or follows a prescribed diet, check both toothpaste ingredients and rewards with your veterinarian, since flavored dental products may contain animal proteins.
- Small-headed, soft-bristled pet toothbrush.
- Dog-labeled toothpaste in an accepted flavor.
- Non-slip mat and good lighting.
- Tiny, diet-compatible rewards.
- Clean water for rinsing the brush afterward.
Good to know: If your dog swallows human toothpaste or a product containing xylitol, contact a veterinarian or animal poison service promptly rather than waiting for symptoms.
- 3
Create a Calm, Predictable Setup
Pick a quiet location with good lighting and secure footing, then practice after your dog has had a chance to toilet and settle rather than immediately after exciting play. Sit beside your dog facing roughly the same direction, which usually feels less confrontational than leaning over the head or approaching face-to-face. A small dog can stand on a floor mat or sit comfortably on your lap if that is already a relaxed position, but avoid raised counters where backing away could cause a fall. Begin with a 30–60-second training session once or twice daily, stopping sooner if needed; these early sessions are about cooperation, not cleaning every tooth. Use a consistent cue such as “teeth time,” present the mat and supplies, and reward your dog for approaching so the setup predicts something pleasant. Let your dog move away, and treat turning the head, stiffening, repeated lip licking, or showing the whites of the eyes as signals to pause and make the task easier. Never pin your dog down, clamp the muzzle shut, or ask another person to overpower them, because forced handling can turn a manageable hesitation into a lasting defensive response.
Good to know: Keep your face away from your dog's mouth, even with a normally gentle pet; surprise, discomfort, and restraint can change how a dog responds.
- 4
Teach Your Dog to Accept Lip Handling
Start by moving your hand toward the cheek, say “yes” or use another familiar reward marker while your dog remains relaxed, and then deliver a tiny treat. Progress to a one-second cheek touch, followed by a brief touch at the edge of the lip, completing only 3–5 easy repetitions before a break. Once those movements are comfortable, lift the lip just enough to expose one canine tooth, release it immediately, and reward without attempting to open the mouth. Gradually increase that lip lift to 2–3 seconds and practice on both sides, staying with the current stage until several repetitions look easy across at least two short sessions. An optional chin-rest behavior, where your dog voluntarily places the chin in your open hand or on a folded towel, can provide a predictable position without gripping the muzzle. If your dog lifts the chin away, stop touching the face and invite another attempt only after a pause, so the behavior remains a voluntary signal of readiness. This preparation may take a few days or several weeks, especially after unpleasant past handling, and rushing through it usually costs more time than building trust in small increments.
- Hand approaches cheek without contact.
- Brief cheek touch stays comfortable.
- One-second lip lift reveals a tooth.
- Both sides tolerate a gentle lip lift.
- Dog can leave and willingly return.
Good to know: Reward after releasing the lip rather than keeping it lifted while your dog chews; this separates mouth handling from eating and reduces awkward contact with your fingers.
- 5
Introduce Toothpaste and Brush Separately
Offer a tiny smear of dog toothpaste on a clean dish and let your dog investigate voluntarily before bringing it anywhere near the gums. If the scent or taste makes your dog retreat, try another dog-safe flavor or practice handling with a water-dampened brush while you look for a better option; do not smear an unwanted flavor deep into the mouth. Next, show the toothbrush from a comfortable distance, reward calm interest, and gradually bring it closer over several repetitions without touching the teeth. Once the brush itself is unremarkable, add a small smear of toothpaste according to the product label and allow a brief lick if your dog wants one, without encouraging chewing on the bristles. Lift the lip and touch the dampened bristles to the outside of one canine tooth for about one second, then withdraw the brush and reward. Build from a stationary touch to one gentle stroke, then to two or three strokes on nearby teeth, changing only one challenge at a time rather than simultaneously increasing duration, pressure, and reach. Toothpaste can make the experience more appealing, but the mechanical action of soft bristles is central to plaque removal, so toothpaste licking alone is not a substitute for brushing.
Good to know: If your dog grabs the toothbrush, avoid turning it into a tug game; pause until they release it, then restart with a shorter, calmer presentation.
- 6
Brush the Outer Surfaces Gently
Once your dog accepts several strokes, lift the upper lip and position the brush against the outside tooth surfaces at roughly a 45-degree angle toward the gumline, where plaque tends to collect. Use small circles or short, gentle strokes with only enough pressure for the bristles to contact the teeth and gum margin, not enough to flatten the brush head or scrub the tissue. Start beside a canine tooth rather than tackling the small front incisors immediately, since many dogs find handling at the very front of the mouth more bothersome. Work gradually toward the premolars and molars by easing the cheek aside, paying particular attention to the upper rear teeth without pushing the brush blindly into the back of the mouth. Brush the lower outer surfaces as your dog allows, repeat on the opposite side, and add the front teeth when the rest of the routine is comfortable. The mouth can remain mostly closed, and you should prioritize accessible outer surfaces rather than prying the jaws apart to reach the tongue-facing sides; ask your veterinary team whether additional surfaces need attention for your dog. Begin with just 5–10 seconds of actual brushing and build toward roughly 1–2 minutes for the whole session when tolerated, using dog toothpaste as labeled and allowing swallowing without forcing a rinse.
- Angle soft bristles toward the gumline.
- Keep pressure light and movements small.
- Cover upper and lower outer surfaces.
- Include rear teeth without forcing access.
- Stop before patience becomes distress.
Good to know: Ask a veterinary nurse, technician, or veterinarian to demonstrate brush placement if you cannot reach the rear teeth comfortably; a smaller brush head may help more than a longer session.
- 7
Adjust the Routine When Your Dog Resists
If your dog backs away as soon as the brush appears, return to rewarding its presence at a distance for a few sessions instead of trying to complete a cleaning that day. If resistance begins only when brushing starts, shorten contact to one second and check whether the brush head is too large, the toothpaste is disliked, or your hand is pulling the lip too tightly. For dogs that mainly lick or chew the brush, allow a brief toothpaste taste first, then try one brushing stroke followed by a reward before they have time to grab it. If your dog tolerates one side but not the other, change your sitting position rather than twisting the head, and work on the harder side in a separate short session. Stop brushing and contact your veterinarian if you see bleeding, notice pain, or encounter a sudden change in tolerance, and do not assume that bleeding gums simply need tougher brushing. Growling, freezing, snapping, or repeated escape attempts mean the session should end immediately; never punish a growl, and seek veterinary guidance plus help from a qualified reward-based behavior professional when there is a bite risk. While working through training, your veterinarian may suggest an appropriate dental wipe, diet, or chew, but avoid replacing brushing with antlers, bones, hooves, or very hard chews that can fracture teeth.
- Brush avoidance: increase distance and reward calmness.
- Contact avoidance: reduce duration and check fit.
- One-sided resistance: reposition without twisting.
- Pain or bleeding: stop and contact your veterinarian.
- Threatening behavior: end the session without punishment.
Good to know: For dental products available in your region, look for the Veterinary Oral Health Council seal indicating evidence for plaque or tartar control; check the specific claim, size guidance, and suitability for your dog.
- 8
Finish Positively and Clean Your Equipment
End each session with a consistent release cue such as “all done,” followed by a tiny treat, gentle praise, or a favorite calm activity your dog enjoys. A small reward does not cancel the benefit of brushing, and rewarding cooperation is more useful than withholding reinforcement in pursuit of a perfectly food-free mouth. Follow the toothpaste label if it includes specific after-use instructions, but do not force water into your dog's mouth or use a human mouthwash to finish the job. Rinse the toothbrush thoroughly under running water, remove visible toothpaste and debris, and leave it uncovered in a clean place where the bristles can air-dry. Give each pet a separate brush, and replace yours when bristles become bent or splayed, commonly around every 3 months or sooner if your dog chews it. Record a simple success measure, such as “left side, 15 seconds, relaxed,” so tomorrow's session builds from what actually worked rather than an arbitrary target. If you managed only a few teeth, regard that as useful practice and return to the remaining areas in a later session rather than extending the current one until your dog struggles.
- 9
Build a Daily Habit and Plan Follow-Up Care
Aim for brushing your dog's teeth every day once the training foundation is comfortable, because plaque accumulates continually and infrequent brushing gives it more opportunity to harden into tartar. Attach the routine to an existing daily event, such as your dog's settled period after the evening walk, and keep supplies nearby but beyond chewing reach. During the learning phase, use a calendar to track brief sessions and increase coverage gradually, moving toward all accessible outer surfaces rather than permanently brushing just the easiest teeth. If you miss a day, resume normal gentle brushing the next day instead of using extra pressure or a much longer session to compensate. Schedule oral-health checks at the interval your veterinarian recommends, discuss dental health at routine wellness visits, and arrange an earlier examination whenever breath, chewing, gum appearance, or handling tolerance changes. Some dogs still need professional dental cleaning despite excellent home care, because brushing cannot treat disease below the gumline or remove established tartar, and a veterinarian must assess those needs individually. The best way to brush a dog's teeth without a struggle is to preserve cooperation at every stage: calm daily practice and timely veterinary care protect the mouth better than occasional forced sessions.
- Work toward gentle daily brushing.
- Pair dental care with a predictable daily event.
- Track comfort as well as tooth coverage.
- Keep recommended veterinary dental appointments.
Good to know: If progress stalls for 1–2 weeks despite making the task easier, ask your veterinary team to review comfort, equipment, and technique rather than increasing restraint.



Ask about this guide
Leave a comment or a question about your own pet and the Pawlito assistant replies right away with practical next steps.