How to Clean Your Dog's Paws After Walks
Learn how to clean dog paws after walks with a gentle, step-by-step routine for removing mud, salt, and grit while keeping paw pads comfortable.
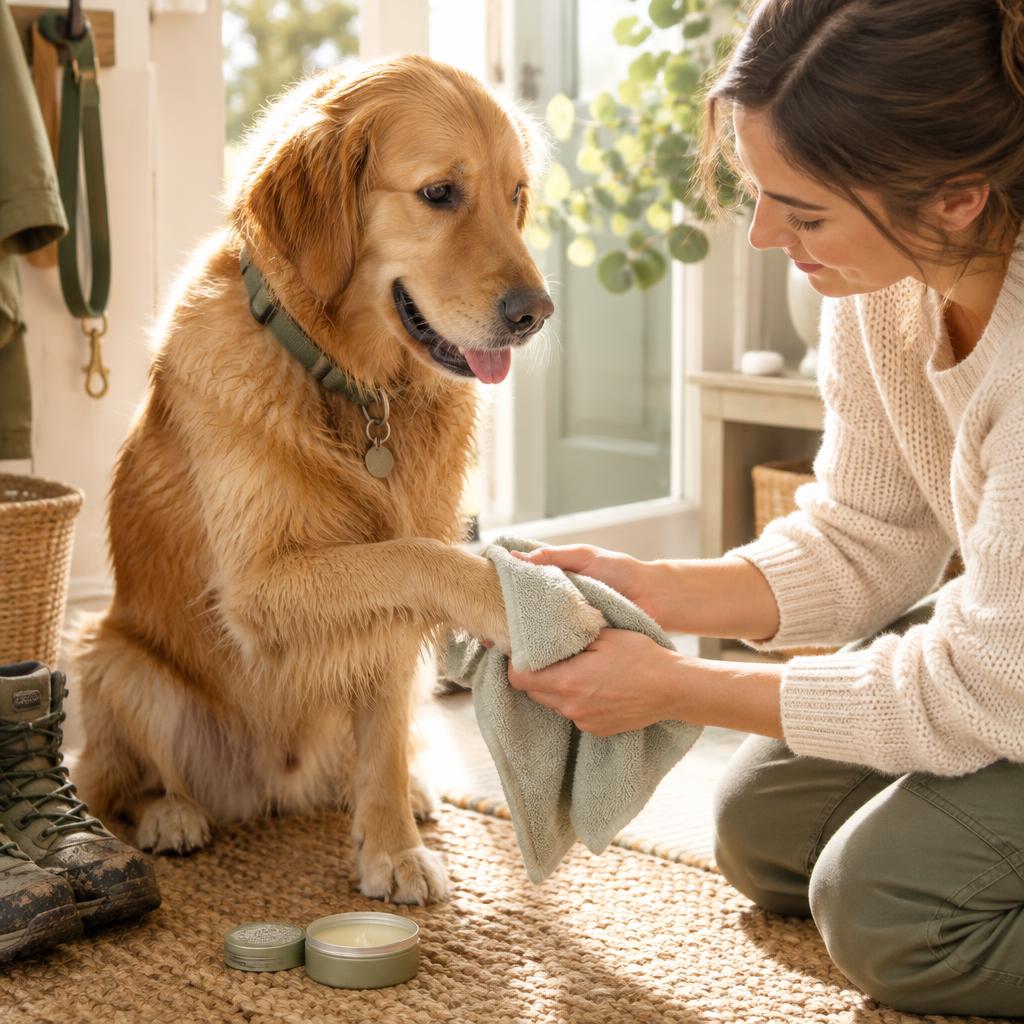
A calm, safety-first approachThis guide provides general education. Contact your veterinarian when symptoms are painful, persistent, or unusual.
- 1
Prepare a calm, nonslip cleaning station
Step 1: Set up a paw-cleaning spot near your entrance so you can remove outdoor dirt before your dog tracks it through the house. Place a washable, nonslip mat on the floor, then gather a soft cloth, an absorbent towel, and a shallow bowl or squeeze bottle of comfortably lukewarm water. Keep everything within reach so you do not need to leave your dog standing in a tub or balancing on a slippery surface while you fetch supplies. For most everyday walks, plain water and a soft cloth are enough, so save dog-safe shampoo for dirt that will not rinse away easily. Choose a quiet area where your dog can stand naturally, and use a few small treats or gentle praise to make the station feel welcoming rather than restrictive. If bending is difficult for either of you, sit beside your dog on a stable low stool instead of lifting them onto a counter or another raised surface.
- Washable, nonslip mat
- Soft cloth and absorbent towel
- Comfortably lukewarm water
- Small treats, if appropriate
- Dog-safe shampoo only when needed
Good to know: Keep a dedicated paw-cleaning basket by the door, but replace damp towels promptly so your supplies stay fresh and ready.
- 2
Check each paw before you begin
Step 2: Before wiping, briefly inspect each paw for anything that needs more care than a routine cleanup. With your dog standing comfortably, support one leg close to the paw and lift it only as far as the joints move easily, without pulling it sideways or backward. Look at the pads, nails, spaces between the toes, and any dewclaws, checking for redness, bleeding, swelling, broken nails, or material caught in the fur. Gently separate the toes only if your dog accepts it, and stop if they flinch, repeatedly pull away, growl, or appear uncomfortable. You can remove loose surface debris that slides away easily, but do not dig into the skin or pull at embedded glass, thorns, or sharp grass seeds. If you notice a wound, a damaged nail, persistent limping, or signs of pain, stop routine cleaning and contact your veterinarian for advice rather than trying to treat the problem yourself.
- Inspect pads and toe spaces
- Check nails and dewclaws
- Notice limping or tenderness
- Leave embedded objects alone
Good to know: A phone flashlight can help you see between dark pads, but keep one hand available to support the paw gently.
- 3
Match the cleanup to the walk
Step 3: Choose the gentlest cleaning method that will remove what your dog picked up outside, rather than giving every paw a soapy wash after every outing. After a dry walk, a quick check and a soft, slightly damp cloth may be all you need to lift dust and loose grit. For wet mud, use water to loosen the dirt first, because rubbing gritty mud directly across the pads can irritate the skin. If dried mud has hardened in the fur, hold a lukewarm wet cloth against it briefly until it softens, then ease it away without tugging. After walks on salted or treated sidewalks, rinse the paws thoroughly with plain water and prevent licking until the residue is gone. If you suspect contact with an unknown chemical, fuel, pesticide, or another potentially hazardous substance, prevent licking and promptly call your veterinarian or an animal poison service for substance-specific cleaning advice; do not experiment with solvents or household cleaners.
- Light dust: use a damp cloth
- Mud: soften before removing
- Road salt: rinse thoroughly
- Unknown chemicals: seek prompt advice
Good to know: Wash away road salt as soon as you get home, including residue on the lower legs or belly that your dog could lick.
- 4
Rinse gently, one paw at a time
Step 4: Clean one paw at a time using a damp cloth, a gentle stream of lukewarm water, or a shallow container your dog can comfortably step into. Test the water against the inside of your wrist first, aiming for a neutral, comfortable temperature rather than water that feels noticeably hot. Support the paw close to the ground and let the water carry loosened dirt away from the pads instead of pressing hard or scrubbing. Work around each pad and gently wipe between the toes where sand, mud, and sidewalk grit can collect, taking care not to force the toes apart. If you use a bowl, replace the water whenever it becomes dirty so you are not dipping clean paws into a muddy mixture. Keep the session brief and pause between paws when needed; if your dog becomes distressed or may bite, stop handling the paws and ask your veterinarian or a qualified reward-based trainer for help.
- Test the water temperature
- Use low water pressure
- Support the paw gently
- Refresh dirty rinse water
- Pause if your dog struggles
Good to know: Dogs who dislike dipping their feet often do better with a squeeze bottle and a towel underneath, allowing you to control the flow.
- 5
Use cleanser only for stubborn residue
Step 5: If water alone leaves stubborn grime, use a dog-safe shampoo suitable for the paws and follow its label for application, dilution, and rinsing. Apply only what the directions require to the dirty area, then gently work it through the fur without harsh rubbing or prolonged soaking. Avoid household disinfectants, alcohol, hydrogen peroxide, essential oils, and human cleaning wipes, which may irritate paw skin or leave residue your dog could ingest. Paw wipes labeled for dogs can be convenient for light surface dirt, but choose an unscented option where possible and remember that wipes may not adequately remove packed mud or road salt. Rinse shampoo away thoroughly, including from between the toes and around the nails, until the fur and skin no longer feel slippery or carry visible suds. For sticky substances that will not release with gentle washing, stop and ask your veterinarian for advice rather than cutting close to the skin or using a solvent to dissolve the mess.
- Choose products labeled for dogs
- Follow the product directions
- Avoid harsh household cleaners
- Rinse all shampoo away
Good to know: If your dog has sensitive skin or a current paw condition, ask your veterinarian which cleaning products and frequency are appropriate.
- 6
Dry the pads and spaces between the toes
Step 6: Pat each paw dry with a clean, absorbent towel as soon as you finish rinsing, rather than letting your dog walk away with wet feet. Start with the pads, then gently blot the fur around the toes, the nail bases, and the lower leg wherever water has splashed. Use a dry corner of the towel to absorb moisture between the toes without pushing fabric deeply into the spaces or rubbing tender skin. Thick paw fur may need a second towel, especially after a muddy walk that required a more thorough rinse. Avoid hot hair dryers and do not cover damp paws with socks or boots, because heat can burn and coverings can trap moisture against the skin. Once the paws are dry, let your dog stand on a clean surface and check that no small stones, sticky patches, or pieces of debris were missed during washing.
- Pat rather than rub
- Blot gently between toes
- Switch to a dry towel as needed
- Leave clean paws uncovered indoors
Good to know: Press a soft towel gently around the paw for a few seconds to absorb water, but avoid squeezing the toes or pulling on the nails.
- 7
Build a relaxed, repeatable routine
Step 7: Reward your dog for calm cooperation throughout the cleanup so paw handling becomes a predictable part of arriving home. Offer praise or a small treat after each comfortable touch, brief lift, or cleaned paw, rather than waiting until your dog has tolerated the entire process. For a puppy or a dog who dislikes handling, practice separately when the paws are already clean by touching a leg briefly, rewarding, and stopping before discomfort builds. Gradually progress to supporting a paw, touching it with a dry towel, and then introducing a damp cloth, keeping practice sessions short and easy. Never punish growling or pin your dog down to finish cleaning, because those responses can increase fear and make future handling less safe. If your dog suddenly objects to a routine they previously accepted, speak with your veterinarian to rule out a medical concern before treating it simply as a training problem.
- Reward small moments of cooperation
- Practice when paws are clean
- Introduce tools gradually
- Respect signs of discomfort
Good to know: Use the same quiet cue, such as “paws,” before each session so your dog knows what is about to happen.
- 8
Monitor comfort and prevent the next mess
Step 8: After cleanup, watch your dog take a few steps and settle, noticing whether they move comfortably or keep licking one particular paw. Contact your veterinarian for persistent licking, redness, swelling, discharge, an unusual odor, recurring cracks, or limping, and seek prompt care for severe pain, significant bleeding, or inability to bear weight. These signs can have several causes, so avoid diagnosing the problem yourself or applying medicated creams or human pain medicines without veterinary direction. For future walks, choose routes with less mud and avoid visibly treated surfaces when possible, while remembering that cleaning cannot undo an injury from hot pavement or other unsafe conditions. Properly fitted dog boots may reduce contact with dirt or deicers if your dog accepts them, but remove them after the walk and check for trapped grit, dampness, or rubbing. Finish by washing reusable cloths, cleaning any bowl or paw-cleaning device according to its instructions, and letting everything dry fully so the next cleanup starts with clean equipment.
- Watch for repeated licking or limping
- Seek veterinary care for concerns
- Check boots for grit and moisture
- Wash and fully dry your supplies
Good to know: Aim for a brief inspection after every walk, then clean only as much as needed; frequent unnecessary scrubbing can leave paws irritated.



Ask about this guide
Leave a comment or a question about your own pet and the Pawlito assistant replies right away with practical next steps.