How to Clean a Hamster Cage Without Stressing Your Pet
Make cleaning a hamster cage less stressful with gentle handling, scent-saving routines, safe supplies, and a calmer return home.
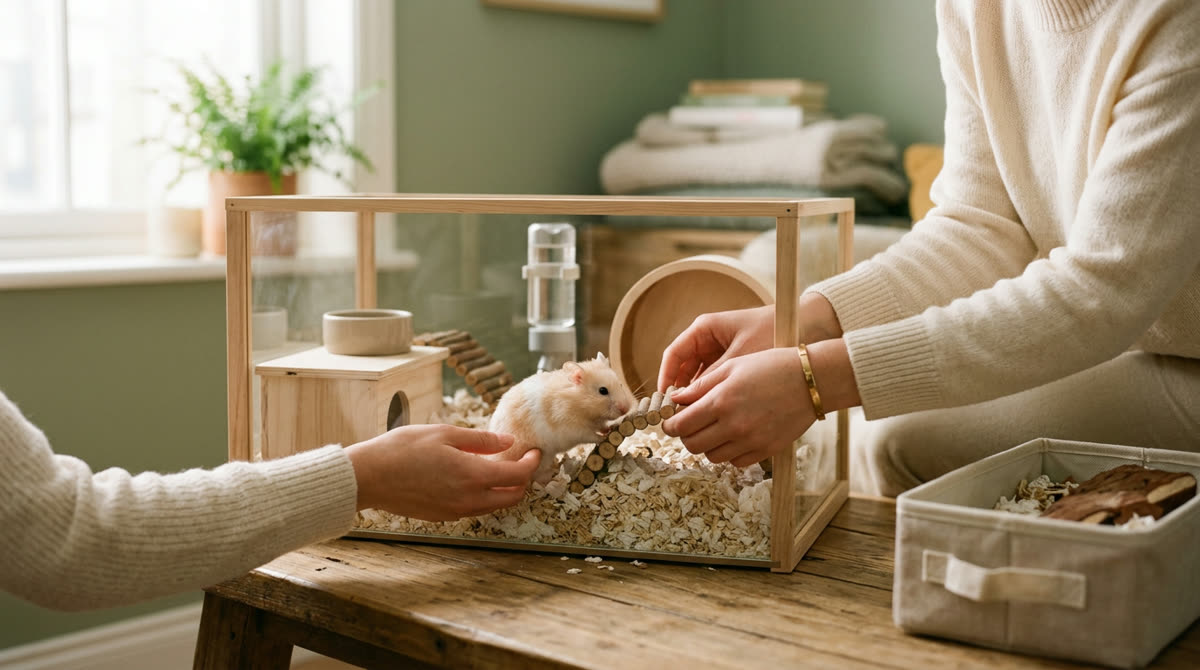
A calm, safety-first approachThis guide provides general education. Contact your veterinarian when symptoms are painful, persistent, or unusual.
- 1
Choose the right cleaning routine and timing
The key to cleaning a hamster cage without stressing your pet is removing waste while preserving the familiar scents that help your hamster feel secure. Check the enclosure daily, spot-clean wet areas as needed, and plan a more involved partial clean when you find widespread damp bedding, spoiled food, or dirty surfaces rather than automatically stripping the cage every week. A spacious enclosure with deep bedding usually needs less extensive cleaning than a small, shallow setup, although individual toilet habits make a big difference. Schedule cleaning for the evening after your hamster wakes naturally, and give them about 10–15 minutes to emerge, stretch, and explore before approaching. Watch their normal movement and breathing first so you can distinguish cleaning-related unease from a problem that was already present. If your hamster has labored breathing, marked lethargy, diarrhea, a wet or dirty rear, or difficulty walking, pause nonessential cleaning and contact a veterinarian promptly. Removing an immediate hazard, such as soaked bedding or a leaking bottle, still matters, but a sick hamster needs veterinary guidance rather than a more aggressive cleaning routine.
- Daily: check water, fresh-food leftovers, wet bedding, and general behavior.
- As needed: remove localized toilet patches and dirty sand.
- Periodically: clean only the sections and equipment that need attention.
- Avoid waking, chasing, or repeatedly moving your hamster.
Good to know: Use what you find in the enclosure—not an arbitrary weekly deadline—to decide how much to clean; a strong ammonia smell means urine buildup needs attention.
- 2
Gather gentle cleaners and matching bedding
Before moving your hamster, assemble fresh bedding, a small scoop, paper towels, a soft brush, a dedicated wash basin, and a bag for discarded material. Choose unscented, low-dust paper bedding or suitable aspen bedding, ideally the same product already in the enclosure so its texture and smell remain familiar. Avoid cedar, strongly scented wood shavings, perfumed bedding, and cotton-like nesting fluff, which can introduce respiratory irritation or entanglement hazards. For routine washing, warm water and a small amount of mild, fragrance-free dish soap are usually sufficient, provided every washed item is rinsed thoroughly and dried completely. If disinfection is necessary because of illness or contamination, ask your veterinarian which product and procedure are appropriate, then follow the label’s dilution and contact-time directions exactly. Keep room sprays, essential oils, deodorizing powders, and strongly scented cleaners away from the enclosure because masking an odor does not remove its source. Set up the cleaning area out of reach of children and other pets, and wash your hands before handling clean supplies or your hamster.
- Matching, unscented replacement bedding.
- Scoop, soft brush, paper towels, and waste bag.
- Mild fragrance-free soap and plenty of rinse water.
- Separate container for clean, dry bedding worth retaining.
- Secure temporary enclosure ready before cleaning begins.
Good to know: Never mix cleaning products, especially bleach with ammonia or acidic cleaners, and never spray cleaner into an occupied cage.
- 3
Prepare a secure temporary space
For a partial clean that requires lifting hides or washing equipment, prepare a secure, well-ventilated small-animal carrier or temporary enclosure with no gaps your hamster could squeeze through. Place it on a stable surface in a quiet room, away from direct sunlight, drafts, and other pets, with the temperature roughly 68–75°F or 20–24°C. Add several handfuls of familiar, clean bedding, a lightweight hide, a small amount of the usual food, and an accessible water source that cannot easily leak or tip over. Encourage your hamster into a tunnel, mug, or small carrier using a piece of their normal food, then transfer them close to the bedding surface rather than grabbing from above. Make sure the temporary enclosure closes securely, since a cardboard box or open bucket may be climbed out of or chewed through. Aim to finish a straightforward partial clean in about 20–30 minutes, but prioritize complete rinsing and drying over rushing your pet back into a damp cage. For a tiny, accessible toilet patch, your hamster can stay in the main enclosure if they are awake, remain clear of your scoop, and you do not need to disturb their burrow or use cleaner.
- Secure lid and adequate ventilation.
- Familiar bedding and a covered hiding place.
- Usual food and reliably accessible water.
- Quiet location protected from pets, heat, and drafts.
Good to know: Do not use an exercise ball as a holding space; it offers no proper retreat and can expose your hamster to collisions, trapped toes, and poor ventilation.
- 4
Remove wet bedding and spoiled food first
Start the actual cage cleaning by identifying the toilet area, often a corner, a sand bath, or a chamber near the sleeping nest. Use a small scoop to remove urine-soaked bedding and the immediately surrounding damp material, working gently so you do not collapse an occupied tunnel. Follow moisture down through the bedding rather than removing only the stained surface, because hidden wet layers can continue producing ammonia. Check accessible food-storage areas for fresh vegetables, fruit, or other perishable scraps each day, and remove them before they spoil, sooner in warm conditions. Leave clean, dry stored seeds and pellets where possible because emptying the entire hoard can make your hamster feel that their food supply has disappeared. If a food stash is wet, moldy, or otherwise contaminated, discard the affected material and provide a small replacement portion of the hamster’s normal dry food. Pick out obvious droppings during these checks, but do not dismantle every burrow simply to chase a few dry pellets while leaving the more important urine patches untouched.
Good to know: A suddenly much wetter enclosure can reflect a leaking bottle or a change in urination; check the bottle first and contact a veterinarian if unusual thirst or urination persists.
- 5
Refresh bedding without erasing every familiar scent
For a more involved partial clean, work on one dirty section at a time instead of automatically emptying the entire enclosure. Set aside genuinely clean, dry bedding from an undisturbed area, and leave the nest structure intact whenever it is dry and hygienic. As a practical guide, aim to retain around one-third to one-half of the old bedding during a necessary larger refresh, and retain even more when only one small section needs replacing. This is not a hygiene quota: never save bedding that is urine-soaked, moldy, heavily dusty, or contaminated simply to preserve scent. Add fresh bedding to restore the previous depth, aiming for a substantial burrowing zone around 10–12 inches or 25–30 centimeters deep, or deeper where the enclosure safely allows it. Gently settle the bedding so tunnels can hold their shape, then distribute some retained clean material through the refreshed section without dismantling the remaining nest. A complete bedding change may be necessary after certain contamination or health problems, but follow your veterinarian’s instructions in those situations rather than retaining material that could undermine treatment.
- Keep clean bedding and dry nesting material.
- Discard wet, spoiled, or contaminated material.
- Refresh dirty sections rather than the whole habitat.
- Restore a deep, stable burrowing area.
Good to know: If the whole cage repeatedly becomes dirty very quickly, review enclosure size, bedding depth, ventilation, and water leaks instead of relying on constant full resets.
- 6
Wash dirty equipment and dry it completely
Wash the food bowl and water bottle or bowl daily, using a suitable bottle brush to reach hidden buildup and rinsing until no soap remains. During the partial cage clean, remove urine and stuck-on debris from the wheel, washable hides, platforms, and exposed base with warm water and mild fragrance-free soap. Clean the surfaces that actually need it rather than scrubbing every scent-marked object in the same session, unless contamination makes a thorough clean necessary. Rinse each washed item well, towel-dry it, and allow remaining moisture to evaporate before placing it against bedding, where trapped dampness can encourage spoilage. Inspect wooden and cork accessories carefully, replacing pieces that are deeply urine-soaked, moldy, splintered, or impossible to clean adequately without damaging them. Sift urine clumps and debris from the sand bath as needed, and replace the sand when it is damp, dirty, or smells rather than adding clean sand over contaminated layers. Use additive-free sand labeled suitable for hamster sand baths rather than fine bathing dust, and avoid improvised baking or microwaving methods for sanitizing accessories because materials and fire risks vary.
- Rinse bottles, bowls, and washable surfaces thoroughly.
- Check the wheel for urine deposits and rough edges.
- Discard damaged or persistently contaminated porous items.
- Return equipment only when completely dry.
Good to know: Never bathe your hamster to make them smell as clean as the enclosure; water bathing can cause chilling and stress, and a dirty coat may warrant veterinary advice.
- 7
Rebuild the familiar layout and check for hazards
Return the main hide, wheel, sand bath, and feeding area to their previous locations so your hamster does not have to relearn the habitat after cleaning. Put retained dry nesting material back inside or beside the usual sleeping hide, and offer torn, plain, unscented toilet tissue if additional nesting material is needed. Restore tunnel entrances where practical, but avoid repeatedly excavating the bedding to reproduce a burrow exactly. Support heavy items such as ceramic hides and sand dishes on secure platforms or the enclosure base so they cannot sink onto a hamster tunneling underneath. Spin the wheel by hand to confirm that it turns freely, remains stable, and does not rub against newly added bedding. Refill the water supply, check that a bottle releases water properly without continuously dripping, and position its spout where your hamster can reach it comfortably. Finally, secure all doors and the lid, check for newly accessible escape routes created by raised bedding, and confirm that the cage is dry and free of lingering cleaner odor.
- Familiar hide and equipment positions restored.
- Heavy accessories supported against collapse.
- Wheel stable and free-spinning.
- Water accessible and not leaking.
- Doors, lid, and ventilation openings checked.
- 8
Let your hamster return at their own pace
Bring the temporary carrier to the enclosure and let your hamster step out through a safe, low opening, or use the same tunnel or mug transfer that worked earlier. Keep lighting subdued and room noise low, then move your hands away so your pet can investigate without being followed. Place a small portion of their usual food near a familiar hide or lightly scatter it in an accessible area to encourage normal foraging without overfeeding. Brief sniffing, scent marking, rearranging bedding, or checking the perimeter can occur after cleaning and does not automatically mean something is wrong. Observe quietly for about 15–30 minutes, looking for comfortable movement and the ability to reach water, shelter, and the wheel. Skip optional handling for the rest of that waking period, especially if your hamster chooses to hide or immediately rebuild the nest. If they repeatedly scramble at the walls or seem unusually agitated, reduce noise and light, check for missing shelter, unstable equipment, heat, or residual odors, and make only the essential correction rather than rearranging everything again.
Good to know: If agitation comes with difficult breathing, weakness, collapse, or suspected cleaner exposure, stop routine settling-in efforts and seek urgent veterinary advice.
- 9
Follow up and adjust the next cleaning session
During the next 24 hours, confirm that your hamster emerges during their usual active period, uses the water supply, and resumes familiar behaviors such as foraging, grooming, or wheel running. Food may disappear into a hoard rather than being eaten immediately, so combine food checks with observations of activity, droppings, and overall behavior. If your pet spends unusually long rebuilding after every clean, preserve more clean nesting material next time, change fewer sections, and avoid washing all accessories on the same day. If an unpleasant odor returns within a day or two, look for a missed urine patch beneath the nest, dirty sand, spoiled stored food, or a slow bottle leak rather than using fragrance to cover it. Keep a brief note of toilet locations and cleaning dates for two to four weeks so you can develop a predictable, individualized hamster cage cleaning routine. Contact a veterinarian promptly for persistent appetite loss, reduced droppings, unusual thirst, skin irritation, or a marked behavior change, and seek urgent help for diarrhea with weakness or any breathing difficulty. Successful low-stress cleaning leaves the habitat hygienic, dry, and recognizably your hamster’s own—not stripped of every scent or freshly rearranged each time.
Good to know: If you suspect cleaner residue is causing distress, move your hamster to the prepared safe carrier away from fumes, contact a veterinarian, and keep the product packaging available.



Ask about this guide
Leave a comment or a question about your own pet and the Pawlito assistant replies right away with practical next steps.