How to Build a Safe Playpen for Small Pets
Build a small pet playpen with secure walls, safe flooring, and enriching features that suit your pet’s size, habits, and supervision needs.
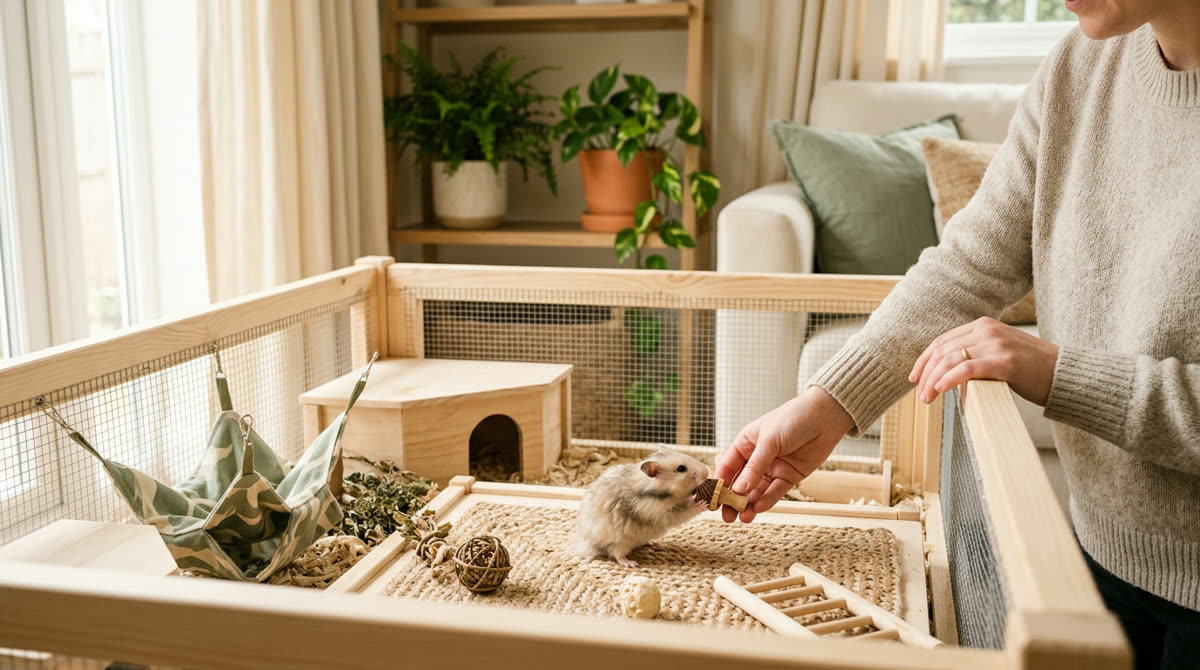
A calm, safety-first approachThis guide provides general education. Contact your veterinarian when symptoms are painful, persistent, or unusual.
- 1
Plan Around Your Pet’s Species and Habits
Before building a small pet playpen, identify your pet’s species, adult size, chewing strength, and ability to climb, jump, squeeze through gaps, or burrow beneath barriers. Rabbits need room to hop and stretch, guinea pigs benefit from open running routes and sheltered resting spots, and hamsters, gerbils, mice, rats, and ferrets require particular attention to climbing and escape routes. Mark a proposed footprint with painter’s tape, such as 4 by 6 feet for a supervised rabbit or guinea pig exercise area, and enlarge it wherever possible; this is a planning example, not a universal minimum or a substitute for species-specific housing guidance. Choose a layout that still leaves an open movement route after adding shelters, water, and enrichment, rather than filling every square foot with accessories. Treat the pen as an additional exercise space unless its dimensions, equipment, and security independently meet your pet’s full-time housing needs, including during your absence. Plan separate sessions for different species and unfamiliar animals, because even a spacious pen cannot prevent injuries from incompatible introductions. Write down your pet’s known behaviors, such as chewing plastic corners or jumping onto hideouts, so the design addresses the escape methods your own animal is most likely to try.
- Identify climbing, jumping, digging, and chewing risks.
- Measure the available floor space.
- Allow room for movement and resting areas.
- Use the pen only for compatible, established companions.
Good to know: Rabbits and guinea pigs should not share a playpen: their communication, dietary needs, and injury risks differ.
- 2
Choose a Quiet, Pet-Proof Location
Set up the playpen indoors on one level, away from stairs, exterior doors, fireplaces, reclining furniture, and other places where an escaped pet could become trapped or injured. Choose a room with a closable door and remove free-roaming cats and dogs before the small pet enters, since supervision alone cannot reliably prevent a sudden chase or paw strike. Keep curtains, houseplants, electrical cords, chargers, and furniture edges outside reach, remembering that a rabbit or rat may reach through bars farther than expected. A starting clearance of 12 inches around the pen can help, but increase it wherever your animal could still contact an object through the walls or from a raised platform. Check the room with a thermometer and follow temperature guidance for the species; chinchillas are particularly heat-sensitive, so a warm room that seems comfortable to you may still be unsuitable. Avoid direct sun, radiators, strong drafts, aerosols, and recently cleaned surfaces with lingering fumes, because small enclosed areas can become uncomfortable quickly. Leave a clear access route around at least one side so you can reach a frightened or injured pet without climbing over panels or moving heavy furniture.
- Close the room door and exclude other pets.
- Move cords, plants, and curtains out of reach.
- Check temperature and sunlight throughout the session.
- Keep an access route clear.
Good to know: Do not assume an indoor DIY pen is safe outdoors. Outdoor use adds predator, weather, digging, pesticide, and parasite risks that require a different enclosure design.
- 3
Select Escape-Resistant Materials
Use rigid, species-appropriate pen panels with secure connectors, choosing smooth solid walls or sturdy metal barriers rather than fabric, foam, cardboard, or lightweight netting as the main containment system. For rabbits, a 36-inch-high exercise pen is a useful starting point, but athletic individuals may clear it, so choose taller panels or a secure roof when needed rather than treating any height as escape-proof. For climbing rodents and ferrets, plan a rigid, well-ventilated lid from the outset, because tall sides alone do not reliably contain animals that climb seams, bars, or furnishings. Measure every opening, including corners and door frames, and remember that standard puppy-pen spacing is generally inappropriate for small rodents. Mesh openings of 1/4 inch, approximately 6 millimeters, are commonly used for tiny rodents, but confirm suitability for the species and age, especially for juveniles, rather than assuming that dimension guarantees safety. Avoid exposed cut wire, peeling coatings, splintered wood, accessible adhesives, and unknown treated lumber, and reject any panel that bends enough to create a larger escape gap under pressure. If you cannot confidently evaluate materials, spacing, and connector strength, choose a reputable species-specific enclosure instead of adapting household storage grids or improvised fencing.
- Rigid panels suited to the species
- Secure connectors and latches
- Smooth edges without exposed wire ends
- Rigid ventilated cover where needed
- Ruler or tape measure for checking openings
Good to know: Never test a gap by encouraging your pet to push its head through it. An animal can become trapped even when its body cannot follow.
- 4
Build a Non-Slip, Protected Floor
Cover the entire footprint with a continuous waterproof base, such as a purpose-made rigid enclosure tray, and make sure any floor-protecting sheet extends beyond the walls with its edges inaccessible to chewing. Add a species-appropriate surface with traction, because smooth tile, plastic, and laminate can make running uncomfortable and increase slipping during sudden turns. For rabbits and guinea pigs, washable low-pile fleece over an absorbent layer can work if the animals leave it intact, while paper-based bedding may be a better option in a suitably contained tray for some rodents. Remove fabric immediately if your pet pulls out threads or eats it, and avoid towels with loose loops, frayed rugs, exposed foam puzzle mats, and any material already showing bite damage. Keep the floor solid rather than using wire mesh underfoot, and flatten wrinkles or unsecured corners that could catch feet or provide access beneath the pen. For digging species, add an appropriate dig box with securely contained, species-safe substrate rather than relying on a thin floor covering to satisfy burrowing behavior. Anchor containment through the enclosure’s intended frame or base connections, not with accessible tape, loose weights, or heavy objects placed where they could fall onto an animal.
- Continuous waterproof floor protection
- Dry, non-slip walking surface
- No exposed foam, tape, or loose threads
- No reachable edges to lift or chew
Good to know: A waterproof sheet protects your room, but it is not automatically a safe pet-contact surface. Chewing behavior determines whether it needs a more durable covering.
- 5
Assemble and Stabilize the Walls
Lay out the panels around the finished floor, then connect them according to the manufacturer’s instructions so the structure forms a continuous enclosure without unsupported ends. Where the system allows a choice, a simple rectangle is easier to inspect than a complicated shape with narrow corners, but any long wall must be braced as intended so it cannot fold or bow outward. Secure every designated connection point, check that adjoining panels cannot rotate enough to open a gap, and position latches where the animal cannot lift or chew them. If cable ties are permitted as supplementary fasteners, keep them entirely outside the pet’s reach, trim them flush, and do not use them as the sole support for a load-bearing lid or wall. Attach the rigid ventilated cover to the frame with suitable hinges or locking clips, ensuring it cannot slide off, sag into the enclosure, or leave an opening where an animal could become wedged. Keep crossbars, handles, and roof edges out of chewing reach where possible, and never drape a blanket over the pen as an improvised cover because it reduces visibility and ventilation without providing reliable containment. Finally, press gently against each wall from inside and outside, check the floor-level perimeter with a ruler, and rebuild any section that lifts, separates, tips, or exposes a sharp edge.
Good to know: Do not lean over or rest your weight on a lightweight pen. A wall that contains a small animal may still collapse under an adult’s hand or knee.
- 6
Add Shelters, Water, and Safe Enrichment
Place at least one appropriately sized hideout inside the pen, with additional shelters for compatible companions and preferably two exits where one animal might otherwise block another’s escape. Put heavy, stable accessories at floor level, avoid elevated platforms in a basic DIY setup, and position hideouts far enough from the walls that they cannot serve as stepping stones to an escape. Provide fresh water throughout the session using a stable bowl or a familiar, securely mounted bottle, checking the bottle’s flow before every use rather than assuming it works because it is full. Offer the animal’s normal dietary essentials, including unlimited suitable grass hay for rabbits and guinea pigs, and use only a small portion of the usual daily food allowance for foraging activities. Add two or three simple enrichment items initially, such as roomy tunnels, species-safe chew toys, or a supervised cardboard forage box with tape and staples removed, while leaving a clear route for running. Select tunnels large enough for your pet to turn or pass through comfortably without becoming wedged, and avoid openings that might trap the head, limbs, or hips. If adding a wheel for a species that uses one, choose a stable, solid-surface model sized so the animal runs without arching its back, and never substitute an enclosed exercise ball for free movement in the playpen.
- Accessible shelter and resting space
- Fresh water in a familiar container
- Normal species-appropriate food
- Two or three safe enrichment choices
- An unobstructed route for movement
Good to know: Keep enrichment modest at first. An overcrowded pen can hide damage, restrict movement, and make it harder to retrieve a pet calmly.
- 7
Run an Empty-Pen Safety Inspection
Before introducing your pet, spend 5 to 10 minutes inspecting the empty pen at floor level, using a flashlight to check corners, door hinges, underside gaps, and any place where two materials meet. Run a cloth along exposed edges to reveal snags, then correct the underlying sharp or rough surface rather than merely covering it with chewable tape. Push each shelter and water container lightly to confirm it cannot topple easily, and check that no tunnel or accessory can roll against a wall and create a climbing route. Open and close the access door and lid several times, making sure the latch engages fully and that the moving parts cannot drop suddenly onto a pet. Confirm that every animal will remain visible or easily accessible inside its shelter, and avoid hideouts you would have to shake or dismantle roughly to retrieve an occupant. Place a secure carrier nearby with familiar bedding so you can move the animal promptly if the pen fails or the pet needs veterinary attention. Take a reference photo of the finished layout and note the measured gap sizes, which makes later changes, loosened connectors, or missing parts easier to spot.
- No sharp edges or cloth-catching snags
- No widening seams or floor-level gaps
- Stable accessories and functioning latches
- Easy access to every shelter
- Carrier ready beside the pen
- 8
Introduce Your Pet and Troubleshoot Calmly
Schedule the first session during your pet’s normal active period, transfer it in a secure carrier or familiar tunnel where appropriate, and avoid waking a sleeping hamster simply because the pen is ready. Begin with 5 to 10 minutes of close observation from beside the enclosure, providing a familiar hideout and letting the animal explore without chasing, repeatedly picking it up, or forcing it toward toys. If the animal remains comfortable, increase sessions gradually by about 5 to 10 minutes across subsequent visits, adjusting to the species and individual rather than treating a set duration as a required exercise target. Brief caution can be normal, but persistent frantic climbing, repeated collisions, frantic escape attempts, or freezing without recovery are reasons to end the session and reconsider the setting or enclosure. If your pet chews a corner, shifts a panel, or reaches the lid, move it into the carrier before making repairs; do not try to solve the problem with punishment, essential oils, or improvised taste deterrents. Stop immediately and contact a veterinarian for bleeding, limping, collapse, suspected swallowed material, or other signs of injury, and seek emergency veterinary care for breathing difficulty, open-mouth breathing, seizures, or suspected heat distress. Even after several successful sessions, maintain active supervision with your attention on the animal, because a previously secure arrangement may become escapable after a toy moves or a connector loosens.
Good to know: Some small pets find open playpens stressful despite careful introductions. A larger, well-enriched primary enclosure may be the safer option for an animal that repeatedly panics or escapes.
- 9
Clean, Recheck, and Refine the Setup
After each session, return your pet calmly to its secure home and confirm that every animal is accounted for before opening the room door or dismantling panels. Remove droppings, discarded food, and wet bedding immediately, then wash bowls and spot-clean soiled surfaces with a mild unscented detergent, rinsing thoroughly and letting everything dry before reuse. Wash reusable liners when damp or dirty, and if disinfection is needed, use a product labeled for the relevant animal-care surfaces while following its dilution, contact-time, and rinsing instructions with pets elsewhere. Never mix cleaning chemicals, avoid fragranced deodorizers, and check that cleaning residue has not made the floor slippery. Before every use, examine connectors, latches, floor edges, and chewable items, with a more detailed weekly inspection of panel damage, roof security, and any rust or coating loss. Watch your pet after play for normal movement, appetite, breathing, and droppings; contact a veterinarian promptly for new abnormalities, especially reduced eating or droppings in rabbits and guinea pigs, rather than waiting for the next play session. Keep brief notes on session length, favorite activities, and attempted escapes so you can improve the small pet playpen over time, and replace damaged parts instead of relying on repeated temporary patches.
- Remove waste and damp bedding after play.
- Rinse and dry cleaned surfaces.
- Check fasteners and chew damage before reuse.
- Monitor appetite, movement, and droppings afterward.
- Replace weakened panels and accessories promptly.
Good to know: Reassess the entire design as young animals grow or older pets lose mobility. Security, traction, and access needs can change even when the pen itself has not.



Ask about this guide
Leave a comment or a question about your own pet and the Pawlito assistant replies right away with practical next steps.