How to Trim a Rabbit's Nails Safely
Make trimming rabbit nails safer with gentle handling, quick-spotting tips, tiny cuts, and clear advice on when to stop and call a veterinarian.
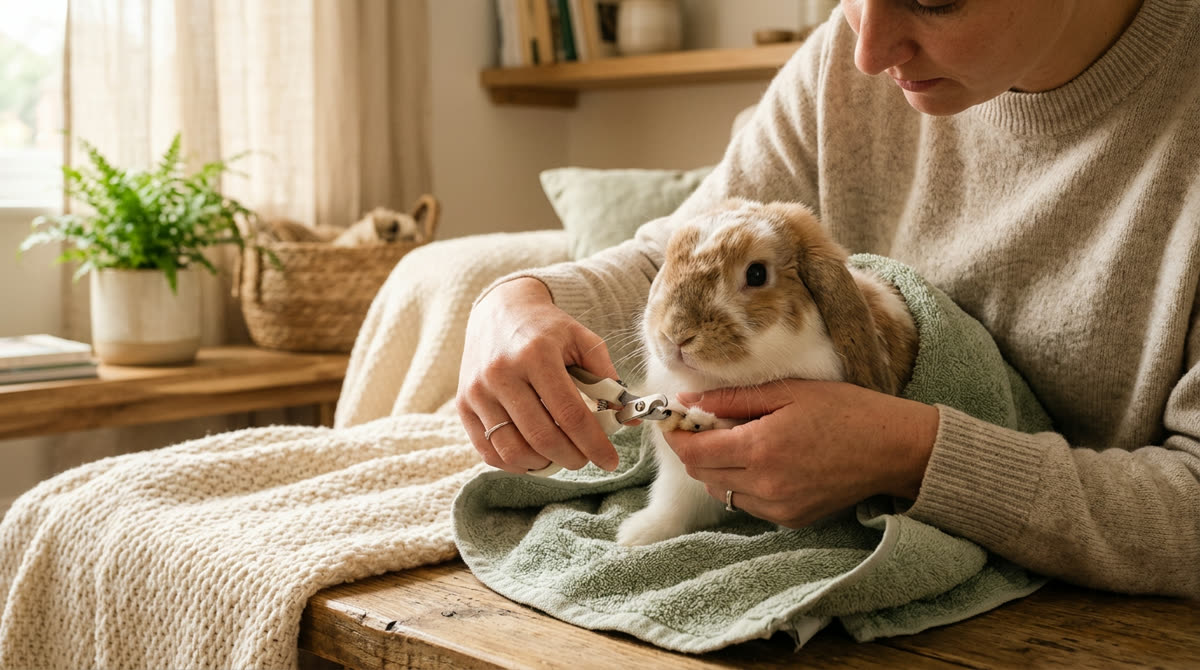
A calm, safety-first approachThis guide provides general education. Contact your veterinarian when symptoms are painful, persistent, or unusual.
- 1
Check whether your rabbit needs a nail trim
Before trimming rabbit nails, watch your rabbit walk on a nonslip surface and check for nails that catch on fabric, curve markedly, or push the toes into an awkward position. Healthy nail length varies with the rabbit’s size, foot shape, and natural wear, so do not use a fixed measurement or the edge of the fur as your only guide. Inspect the nails every 2 to 4 weeks; many pet rabbits need trimming roughly every 4 to 6 weeks, but some need it more or less often. Choose a quiet period when your rabbit is relaxed and eating normally, rather than immediately after a stressful journey or energetic play. If your rabbit is limping, has a swollen toe, or has a nail that is split, dangling, or curling into the skin, stop your home-trimming plans and contact a rabbit-experienced veterinarian. Rabbits with arthritis, spinal problems, or a history of panicking during handling may need a veterinary-team nail trim rather than restraint at home. If this is your first attempt, ask a veterinary professional to demonstrate safe positioning and identify the quick on your rabbit before you try it yourself.
- Watch for snagging, curling, or altered toe position.
- Check all feet for swelling, sores, and damaged nails.
- Choose a calm time when your rabbit is behaving normally.
- Arrange professional help for painful feet or difficult handling.
Good to know: Nail trimming should not be used to investigate or treat a painful foot. Pain, limping, or an embedded nail needs veterinary assessment.
- 2
Prepare your tools and a floor-level workspace
Set up on the floor in a small, quiet room with the door closed, other animals excluded, and a nonslip mat beneath your rabbit. Floor-level handling reduces the risk of a fall, although you still need to prevent sudden twisting or escape attempts. Gather sharp small-animal nail clippers, a bright adjustable lamp, a clean towel, gauze, and pet nail styptic powder labeled for minor nail bleeding. Small scissor-style clippers are often easier to position around rabbit nails than large dog clippers, while human nail clippers can compress or split thicker, curved nails. Check that the blades meet cleanly, and clean the tool according to its instructions before letting it dry completely. Place everything within arm’s reach so you never have to leave a restrained rabbit unattended or stretch across the room for supplies. Have a few pieces of your rabbit’s usual leafy greens or part of their normal pellet allowance ready as rewards, and plan for a session of only 5 to 10 minutes rather than insisting on finishing every nail.
- Sharp, appropriately sized small-animal nail clippers
- Nonslip mat and a clean, loosely wrapped towel
- Bright lamp or a helper-held flashlight
- Gauze and pet nail styptic powder
- Familiar food rewards and a helper if needed
Good to know: Avoid slippery countertops and high tables for home nail trims. Even a calm rabbit can jump or kick unexpectedly when a foot is touched.
- 3
Practice calm handling before you clip
If nail care is unfamiliar, spend several days introducing foot touches before attempting a full trim, using one or two sessions of 1 to 3 minutes each day. Start by rewarding your rabbit for sitting comfortably on the mat, then briefly touch a shoulder or leg and release before they pull away. Gradually work toward touching a paw and separating the fur around one nail for just 1 to 2 seconds, rewarding calm acceptance without gripping harder. Let your rabbit investigate the closed clippers from a safe distance, and introduce their movement and sound away from the feet. Progress at your rabbit’s pace; being able to inspect one nail calmly is more useful than forcing all four feet into a single practice session. Pause if your rabbit repeatedly withdraws, freezes tensely, breathes faster, or tries to scramble away, because escalating restraint can turn a manageable task into a struggle. If nails are already seriously overgrown, do not delay needed care for weeks of training; book a professional trim and continue gentle handling practice afterward.
Good to know: Do not withhold hay or meals to make training rewards more appealing. Rabbits need their usual food access, and a small familiar reward is enough.
- 4
Support the body without forcing restraint
For most beginners, the safest home arrangement is two people at floor level: one supports the rabbit while the other handles the clippers. Keep your rabbit in a natural, belly-down or upright position with the chest, hindquarters, and feet supported against a nonslip surface or a seated handler’s lap. A towel can be draped loosely around the body to limit scrambling, but leave the nose uncovered and never tighten it around the chest or abdomen. Expose only the foot you are working on, keeping the leg close to its natural position instead of pulling it sideways or straightening it forcibly. Never lift or restrain a rabbit by the ears, scruff alone, or legs, and never allow the hindquarters to dangle while the rabbit kicks. Do not place your rabbit on their back to make them become still, because this immobility is a fear response rather than reliable relaxation. If your rabbit kicks, twists, or struggles, stop clipping and calmly return all four feet to the mat; repeated struggling means the session should end and professional help is the safer choice.
- Support the chest and hindquarters throughout handling.
- Keep the spine in a natural position.
- Leave the nose clear and the chest unrestricted.
- Bring one foot into view without stretching the leg.
- Stop immediately if your rabbit kicks or twists.
Good to know: Open-mouth breathing, collapse, or marked breathing difficulty is an emergency. Release restraint safely and seek urgent veterinary care.
- 5
Find the quick and plan a tiny cut
The quick is the living tissue containing blood vessels and nerves inside each nail, and cutting it causes pain and bleeding. Gently part the toe fur and inspect the nail from the side under a bright light, looking for the pink core visible inside many pale nails. On a clearly visible nail, plan to leave approximately 2 to 3 millimeters of nail beyond the quick rather than cutting right up to it. For dark nails, have a helper shine a flashlight from the side or behind the nail, but recognize that thick pigment may still hide the quick completely. When you cannot identify the quick confidently, remove only a very small sliver from the pointed tip, about 1 millimeter or less, rather than guessing how much nail is empty. Do not use a squeeze test or wait for your rabbit to flinch, because reactions are unreliable and pressure itself may hurt or frighten them. If there is no clearly safe tip to remove, or you cannot distinguish the nail from surrounding fur and skin, leave that nail alone and ask a veterinary professional to help.
Good to know: Overgrown nails can have long quicks, so a long nail does not necessarily allow a large cut. Never try to restore the full desired length in one session.
- 6
Clip one nail at a time
Start with whichever nail is easiest to see and reach while your rabbit remains comfortable, rather than following a rigid foot order. Hold the toe gently between your fingers, move fur out of the blade opening, and position the clippers across the narrow tip without twisting the nail. Confirm that only the intended nail tip is between the blades, then make one clean, controlled cut instead of slowly crushing the nail. Inspect the cut surface and your rabbit’s response after every clip, taking only another tiny sliver if you can still clearly identify a safe margin. Avoid trying to match every nail to the same length, because quick length and nail shape can differ even on the same foot. After one or two nails, offer a brief pause with the foot supported or returned to the mat, and reward your rabbit if they are willing to eat. End after a few successful cuts if necessary; splitting a rabbit nail trim across two or more short sessions is safer than continuing with a frightened rabbit or tired hands.
- Separate the fur before positioning the blades.
- Double-check the quick-to-blade distance.
- Make a clean cut without twisting the toe.
- Reassess after every small clip.
- Take breaks before your rabbit begins to struggle.
- 7
Check hidden nails and adjust your approach
Most rabbits have five nails on each front foot, including an inner dewclaw, and four on each hind foot, for a usual total of 18. Check the inner side of each front foot carefully, because the dewclaw sits higher than the other nails and can disappear beneath thick fur. Use a simple foot-by-foot checklist to record completed nails, especially if you divide trimming across different days. If fur blocks your view, part it with your fingers or ask your helper to hold it aside; avoid bringing scissors near a moving toe just to expose the nail. If a nail bends, crushes, or splinters rather than cutting cleanly, stop and check whether the clippers are dull, oversized, or poorly positioned. If your rabbit tolerates front-foot handling but strongly resists a hind foot, leave that foot for a veterinary professional instead of increasing force or extending the leg farther. For very long or curled nails, ask your veterinarian about a staged trimming plan, since the quick may extend farther down the nail and cannot safely be shortened with a deep cut.
- Check both front dewclaws.
- Record unfinished nails for a later session.
- Replace clippers that crush or splinter nails.
- Leave inaccessible or tightly curled nails to a professional.
Good to know: Stop if you discover a nail curling into the toe or foot. Cutting it free at home can leave an unassessed wound or worsen an existing injury.
- 8
Respond promptly to bleeding or injury
If you accidentally nick the quick, stop trimming immediately and keep your rabbit gently supported on a clean towel. Press clean gauze against the nail tip with steady, gentle pressure for 2 to 3 minutes, avoiding repeated checks that can disturb the forming clot. For a small nail-tip bleed, apply pet nail styptic powder according to its label, keeping it away from the eyes, nose, and mouth. If styptic is unavailable, a small amount of plain cornstarch may help a minor tip bleed while you maintain pressure, but it is not a substitute for veterinary care. Contact a veterinarian urgently if bleeding continues after about 5 minutes of sustained pressure, repeatedly restarts, or comes from a split or partly torn-off nail. Seek emergency care immediately for heavy bleeding, collapse, or pronounced weakness, and do not wait for the full 5 minutes when your rabbit appears unwell. Do not pull off a damaged nail, apply a tight foot bandage, or give human pain medication; end the session and follow your veterinarian’s instructions.
Good to know: A quick nick can make later handling more frightening. Once bleeding is controlled, prioritize a quiet recovery rather than trying to finish the remaining nails.
- 9
Check comfort and maintain a regular routine
After the trim, let your rabbit return to a familiar, clean area with good traction, fresh hay, water, and a normal litter setup. Watch them take several steps and check that they bear weight normally without repeatedly lifting or licking a foot. Recheck the nails after 10 to 15 minutes for fresh blood or a snagging edge, but leave further clipping for another session if your rabbit has had enough. Monitor appetite, droppings, and activity for the rest of the day, because ongoing distress or pain should not be dismissed as a normal response to grooming. Contact a rabbit-experienced veterinarian promptly if your rabbit eats less, produces fewer droppings, limps, or develops toe swelling; complete refusal to eat or absence of droppings requires urgent attention rather than waiting overnight. Record the trim date and any unfinished nails, set a reminder to inspect the feet again in 2 to 4 weeks, and adjust future trimming intervals to actual growth. Continue brief, rewarded paw-handling practice between trims, and provide safe exercise and nonslip flooring without relying on abrasive surfaces to file the nails down.
- Confirm comfortable walking and normal weight-bearing.
- Recheck nail tips for renewed bleeding.
- Monitor eating, droppings, and activity.
- Log the date and any nails left unfinished.
- Schedule the next nail inspection.
Good to know: Avoid sandpaper flooring or abrasive nail-wearing mats, which can irritate delicate feet. Routine inspections and small, well-timed trims are a gentler long-term approach.



Ask about this guide
Leave a comment or a question about your own pet and the Pawlito assistant replies right away with practical next steps.