How to Bird-Proof a Room Before Free Flight Time
Make bird proofing a room simpler with a practical safety checklist for windows, fans, hidden hazards, and supervised free flight.
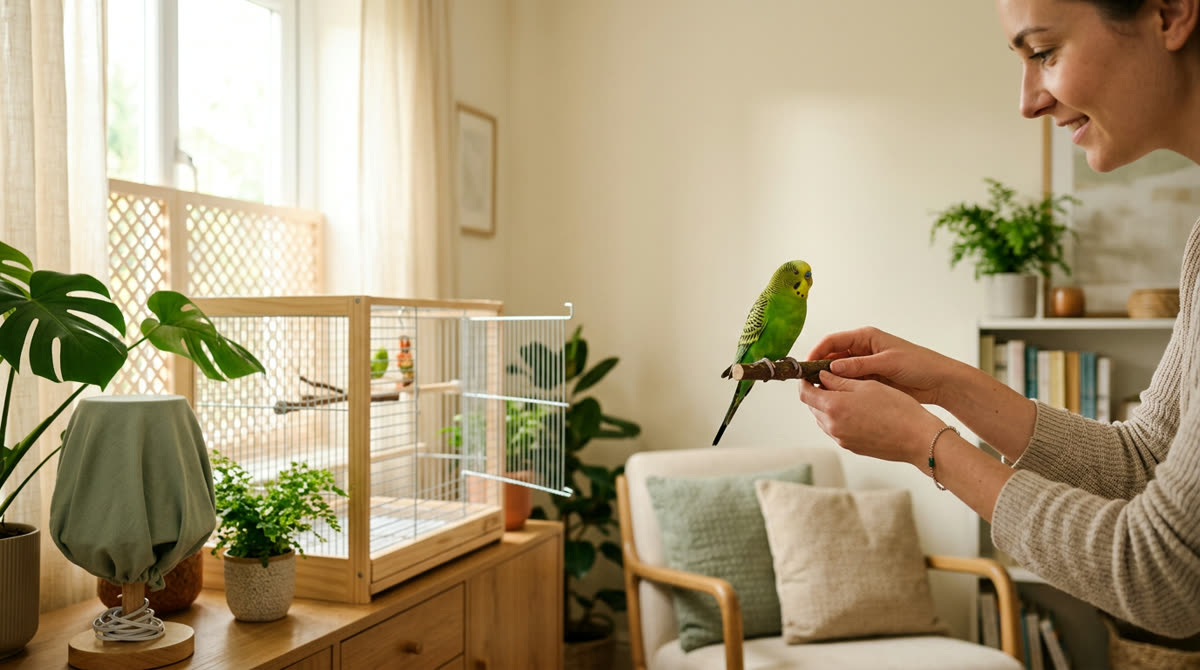
A calm, safety-first approachThis guide provides general education. Contact your veterinarian when symptoms are painful, persistent, or unusual.
- 1
Choose a Room You Can Fully Control
Start bird proofing a room by choosing a quiet bedroom, office, or similar enclosed space with a solid door, secure windows, and enough open space for your bird to fly between stable landing spots without threading through furniture. Avoid kitchens, garages, workshops, and bathrooms because hot surfaces, fumes, tools, and open water make these spaces difficult to secure reliably. For initial sessions, use one room rather than an open-plan living area, and allow yourself 20–30 minutes to inspect it before bringing your bird out. Walk through at three levels—floor height, perch height, and overhead—to identify hazards a walking person might miss, including gaps behind cabinets and exposed ceiling fixtures. Pick a time when nobody needs to cook nearby, clean, move furniture, or repeatedly enter the room, and ask everyone in the household to leave the space undisturbed. If your bird is newly home, unfamiliar with the room, or unable to move confidently between perches, begin with calm observation and voluntary movement rather than encouraging a full circuit of flight. Birds with recent illness, injury, or noticeably changed flight ability need veterinary guidance before exercise, because a safer room cannot compensate for a health-related difficulty.
- Choose an enclosed, non-kitchen room.
- Clear direct routes between landing spots.
- Inspect the floor, furniture, and ceiling.
- Schedule an uninterrupted supervision period.
Good to know: A bird with clipped wings may still gain height, glide, or escape through a door; use the same room-security precautions for every bird.
- 2
Secure Doors, Windows, and Household Traffic
Close and latch every exterior window and room door before opening the cage, checking the actual latch rather than assuming a window that looks shut is secure. Do not rely on insect screens as your main escape barrier, because birds may chew mesh, squeeze through damaged edges, or dislodge a poorly fitted frame. Put a clear “Bird loose—do not enter” sign on the door, tell household members when the session starts, and agree that nobody opens it without your confirmation. Keep cats, dogs, ferrets, and other animals behind a separate closed door, since even a normally calm pet can react suddenly to fluttering wings. If the room opens directly outdoors or into a busy hallway, choose another room when possible; a second closed door provides useful protection against an accidental opening. Check small access points such as pet flaps, open transoms, damaged vent covers, and gaps beneath doors, then secure them with fitted, non-chewable barriers that do not interfere with necessary ventilation. Gather your phone, training treats, and other supplies before release so you will not need to leave the bird unsupervised or repeatedly use the doorway.
- Test window and door latches.
- Post a warning at the entrance.
- Separate all other pets.
- Bring supplies into the room first.
Good to know: Never prop the door open “just for a minute” during free flight; put the bird safely back in its cage before anyone carries items through.
- 3
Make Glass and Mirrors Easy to Recognize
Cover windows, glass doors, and large mirrors before the first flight, because a reflection or a view of open sky can look like a clear route rather than a solid surface. Close securely mounted curtains or blinds so they create a continuous visual barrier, making sure the covering does not leave a tempting uncovered section at bird height. For a permanent setup, a suitable opaque or translucent window covering can preserve daylight while making the entire pane visible; a few widely spaced decals should not be treated as collision protection. Secure curtain pull cords completely out of reach, remove looped tiebacks, and inspect fabric for loose threads that could catch toes or a neck. Check less obvious reflective surfaces, including mirrored closet doors, glass cabinet fronts, and clear room dividers, rather than focusing only on exterior windows. Keep the room evenly lit, including landing areas, and avoid sudden blackouts or switching off the main light while your bird is airborne. Before release, let your bird view the prepared room from its cage or a familiar perch, but never carry or encourage it toward glass to “teach” the boundary through contact.
- Cover full window and mirror surfaces.
- Check glass furniture and partitions.
- Remove accessible blind-cord loops.
- Keep flight paths and perches well lit.
Good to know: If your bird repeatedly aims toward a covered window, stop the session and change the layout or visual barrier rather than assuming it will learn after a collision.
- 4
Eliminate Moving Parts, Heat, and Airborne Hazards
Turn ceiling fans off before release and wait until every blade has stopped completely, then prevent accidental activation by labeling the wall switch and putting remotes out of reach. Unplug accessible portable fans and keep birds away from powered appliances with openings, including space heaters, shredders, and exercise equipment. Shut off and cool lamps or other fixtures that become hot, and remove candles, wax warmers, hot drinks, and heated styling tools from the room. Check the air throughout the home, not just inside the flight room, because smoke, cooking fumes, aerosol sprays, solvent vapors, scented products, and essential-oil diffusers can expose a bird through shared airflow. Overheated PTFE-containing nonstick cookware and some heat-producing appliances can release fumes dangerous to birds, so do not use closing a room door or opening a window as a substitute for eliminating that exposure. Postpone free flight during painting, pest treatment, heavy cleaning, or any activity producing fumes or dust, and do not assume a product labeled “natural” or “pet-safe” is safe for birds to inhale. If exposure occurs or your bird develops open-mouth breathing, pronounced tail movement with breathing, weakness, or collapse, stop immediately, move it to clean air in a secure carrier if this can be done safely, and contact an emergency veterinarian.
- Stop fans and secure their controls.
- Remove heat sources and hot liquids.
- Check for fumes elsewhere in the home.
- Postpone flight during cleaning or renovation.
Good to know: Suspected overheated-nonstick fume exposure warrants immediate veterinary advice even if the bird initially appears normal; do not wait for symptoms.
- 5
Remove Chewing, Swallowing, and Water Hazards
Unplug unnecessary electrical equipment, remove loose charging leads, and route remaining cables through rigid protective covers that your bird cannot readily open or chew. Move jewelry, coins, batteries, magnets, medication, nicotine products, cannabis, craft supplies, and small hardware into closed storage, since parrots in particular investigate objects with their beaks. Remove accessible objects with unknown metal composition, including decorative bells, costume jewelry, and some curtain weights, because swallowed metal or damaged coatings may create a serious exposure risk. Take houseplants out unless you have confirmed the exact species is appropriate around birds and know that the soil, fertilizer, and any pesticide residues are inaccessible. Clear all human food and drinks, especially avocado, chocolate, caffeine, and alcohol, rather than relying on the bird to ignore a plate for a few minutes. Empty buckets, vases, and other open containers, cover or remove aquariums securely, and keep bathroom doors shut so toilets and filled sinks cannot become drowning hazards. Finish by picking up string, yarn, hair ties, rubber bands, and frayed toys, and offer intact, size-appropriate bird toys at a designated perch instead of leaving random household objects available for exploration.
- Protect cables and put away chargers.
- Lock away batteries, medicines, and small objects.
- Remove unverified plants and human food.
- Empty or securely cover open water.
- Discard loose strings and damaged toys.
Good to know: If you suspect chewing of a live cable or swallowing of a battery, magnet, metal piece, or toxic substance, contact a veterinarian immediately; do not induce vomiting or give a home remedy.
- 6
Block Traps and Create Safe Landing Stations
Inspect spaces behind bookcases, between furniture and walls, beneath radiators, and inside open drawers, then close or block gaps where your bird could fall, hide, or become wedged. Use securely fitted smooth panels or move furniture flush where practical, avoiding loose blankets, adhesive surfaces, and makeshift barriers that create new entanglement or chewing hazards. Keep recliners, sofa beds, rocking chairs, and adjustable furniture unused during flight, and check cushions and floor areas before anyone sits or takes a step. Close cupboards and drawers, secure heavy objects that could topple, and remove unstable decorations from shelves your bird may choose as an unexpected landing site. Set up 2–3 stable landing stations with bird-appropriate perches, positioning them away from doors, windows, hot fixtures, and narrow gaps, with open approaches and enough clearance for the bird's fully spread wings. For a confident small bird, two familiar stations about 1–2 meters apart can provide an initial short route, but adjust the spacing to the species, room size, and individual ability rather than making the bird attempt a distance it cannot manage. Keep the cage entrance unobstructed and place a familiar perch at or near it, so returning home remains an obvious option throughout the session.
Good to know: Provide stable stepping or climbing routes for birds that do not fly reliably, and avoid high stations from which an uncertain bird could fall.
- 7
Run a Final Check and Begin a Short Session
Immediately before release, make a 60-second sweep to confirm that doors remain shut, fan blades are stationary, window coverings are in place, and no cup, bag, or newly arrived item has introduced a hazard. Have a secure carrier accessible, keep your avian veterinarian's and emergency clinic's contact details on your phone, and make sure the carrier is not buried in another room. Open the cage door and let your bird come out voluntarily; do not shake the cage, pull the bird out, or toss it into the air to start flying. For a first session in a newly prepared room, plan approximately 5–10 minutes of quiet exploration, allowing more resting than flying and shortening the session if the bird seems uncertain. Sit or stand calmly outside the direct flight path, use familiar step-up or target cues if your bird knows them, and reward chosen landings with a tiny piece of a familiar treat. Keep one responsible adult actively watching the bird throughout, rather than treating a camera, a child, or occasional glances from a laptop as adequate supervision. Watch for repeated missed landings, reluctance to move, or breathing that does not settle promptly with rest, and end the session rather than encouraging “one more flight” when performance changes.
Good to know: The 5–10-minute starting window is an acclimation suggestion, not a daily exercise limit; future out-of-cage time should suit your bird's health, species, confidence, and routine.
- 8
Respond Calmly to Problems and Injuries
If your bird startles and circles the room, stop moving, reduce noise, keep the lighting steady, and give it access to a clear familiar landing site instead of chasing or waving your arms. If it settles somewhere inconvenient but safe, offer a known perch or target and reward a voluntary return; do not climb unstable furniture or repeatedly grab at the bird. When a bird disappears behind furniture, keep everyone still, locate it visually, and prevent crushing before carefully changing the barrier or moving anything nearby. End the session after a collision, and contact an avian veterinarian promptly even if the bird appears to recover, because injuries may not be immediately obvious. Active bleeding, inability to perch, a drooping wing, loss of balance, seizures, or breathing difficulty require immediate emergency veterinary attention, not an attempt to diagnose the problem at home. If you must transport an injured bird, minimize handling and use a ventilated carrier with a smooth paper-lined floor and no high perch if it cannot balance, keeping the environment quiet while following the clinic's instructions. Never compress a bird's chest during restraint, and do not give medication, force food or water, or apply oils or ointments unless a veterinarian specifically directs you.
Good to know: Any cat or dog bite, scratch, or mouth contact needs urgent veterinary assessment, even when you cannot see a wound.
- 9
Return to the Cage and Improve the Setup
Start the return routine while your bird is still calm, using the same cue each time and offering a familiar reward inside the cage rather than ending only after it becomes tired or overstimulated. Allow 5–10 minutes of extra time so you can wait for a voluntary step-up or entry instead of turning the end of free flight into a chase. Keep regular food and water available as appropriate for your bird's routine, and never withhold meals to make it hungry enough to cooperate. Once the bird is inside, latch every cage opening and confirm its location before reopening the room door, moving furniture, or restoring household activity. Check your bird's posture, balance, breathing, and willingness to perch, and contact a veterinarian if you notice limping, unusual quietness, persistent fluffed posture, or any other change following the session. Remove droppings from landing areas after securing the bird, using plain water for simple fresh-soiling cleanup where suitable or a bird-appropriate cleaner exactly as directed, with any required rinsing, drying, and ventilation before reuse. Keep a short note of missed landings, favorite perches, and attempted chewing, then update your bird-proof room checklist and gradually extend comfortable sessions without increasing distance, duration, and distractions all at once.
- Reward a calm return to the cage.
- Latch the cage before reopening the room.
- Check for changes after exercise.
- Clean and inspect landing stations.
- Fix newly discovered hazards before the next flight.
Good to know: Bird proofing a room is an ongoing routine: repeat the safety sweep every session, especially after visitors, cleaning, or changes to furniture.



Ask about this guide
Leave a comment or a question about your own pet and the Pawlito assistant replies right away with practical next steps.