How to Clean a Bird Cage Properly Every Week
Make cleaning a bird cage safer and easier with a weekly routine that removes grime, protects sensitive lungs, and keeps your bird comfortable.
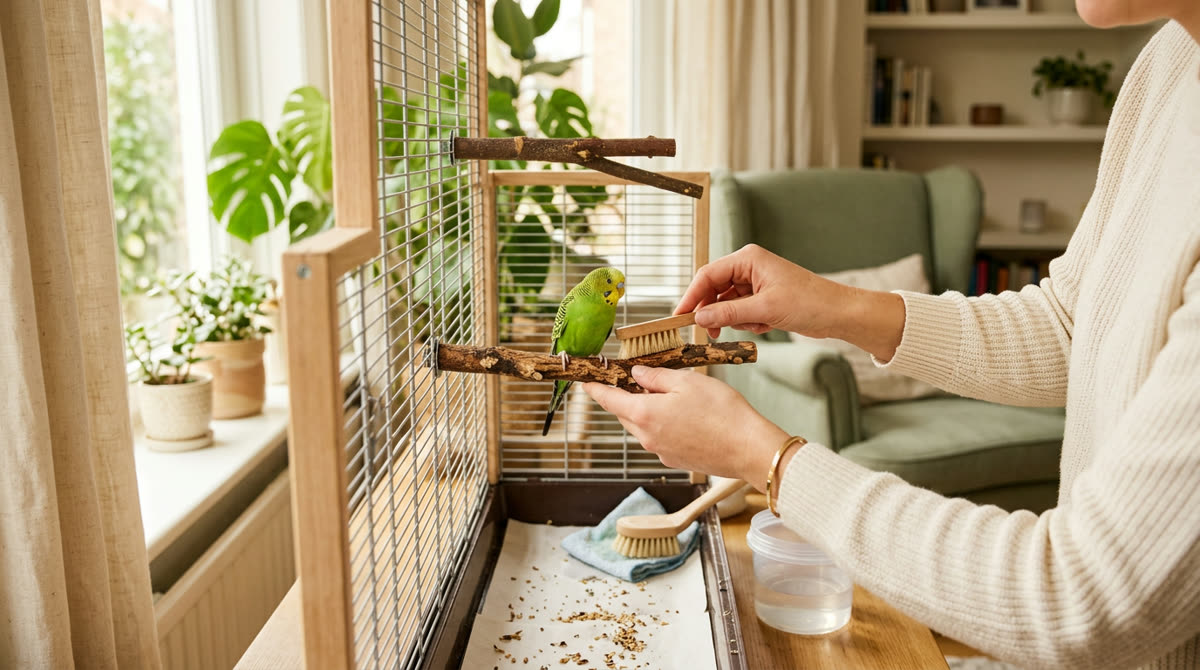
A calm, safety-first approachThis guide provides general education. Contact your veterinarian when symptoms are painful, persistent, or unusual.
- 1
Plan your weekly clean and gather supplies
Set aside about 45–60 minutes for cleaning a bird cage each week, allowing extra time for soaking, disinfectant contact time, and complete drying before your bird returns. A weekly deep clean complements—not replaces—daily liner changes, removal of wet or spoiled food, and washing of food and water dishes, because moisture and food residue allow microbes to multiply between cleaning sessions. Gather fresh plain-paper liners, mild fragrance-free dish detergent, warm water, a dedicated scrub brush, a smaller brush for corners, clean cloths, and a veterinarian-recommended disinfectant labeled for the relevant animal-housing surfaces. Read the disinfectant label before starting, checking its dilution, contact time, rinsing instructions, ventilation requirements, and compatibility with your cage material rather than assuming every product marketed as “pet-safe” is appropriate around birds. Choose a well-ventilated cleaning area away from food preparation, and keep bird-cleaning tools separate from household dishes and bathroom supplies to reduce cross-contamination. Wash your hands with soap and water for at least 20 seconds before and after the job, and wear gloves if you have cuts or will handle disinfectant. If the cage houses a sick bird, several birds, or birds with eggs or dependent chicks, ask an avian veterinarian whether the cleaning frequency or method needs adjusting instead of simply following a standard weekly schedule.
- Plain, unprinted paper liners cut to fit
- Fragrance-free detergent and a suitable labeled disinfectant
- Dedicated brushes, cloths, gloves, and a waste bag
- Clean spare bowls and replacement cage accessories
- A secure carrier or familiar temporary cage
Good to know: Never mix cleaning products, especially bleach with ammonia, vinegar, or other acids. Avoid scented sprays, essential oils, and strongly fuming cleaners around birds.
- 2
Move your bird to a safe temporary space
Before removing trays or opening large cage doors, move your bird into a secure travel carrier or familiar spare cage in a separate room where cleaning fumes cannot reach it. Equip that space with a stable, appropriately sized perch and familiar food and water dishes, positioning the water so it will not spill onto the floor during movement. Use a practiced step-up cue or a treat to encourage the transfer, allowing roughly 5–10 minutes rather than chasing or grabbing a frightened bird to stay on schedule. Close exterior doors and windows, switch off ceiling fans, exclude other pets, and make sure everyone in the household knows not to open the carrier. Keep the temporary space at a comfortable, stable temperature away from direct sun, kitchen fumes, and drafts, and check on your bird periodically throughout the clean. Never leave the bird perched on the cage you are washing or loose in a room containing buckets, open toilets, detergents, or wet equipment, because even a brief distraction can lead to injury or exposure. If your bird becomes severely distressed during transfer, pause and let it settle, but contact a veterinarian promptly for persistent breathing difficulty, marked weakness, or an inability to perch normally.
- Carrier doors and latches secured
- Stable perch plus familiar food and water
- Other pets kept outside the room
- Fans off and escape routes closed
Good to know: Practice short, reward-based visits to the spare cage between cleaning days. A familiar temporary home makes weekly cage cleaning less stressful for both of you.
- 3
Empty the cage and check for problems
Take a quick photo of the cage layout before removing bowls, perches, toys, ladders, the grate, and the bottom tray so you can restore familiar access to food, water, and resting spots later. Before discarding the liner, look for meaningful changes from your bird’s normal droppings, unexpected blood, unusually little waste, or evidence that food has barely been touched, and photograph anything concerning for your veterinarian. Fold soiled paper inward to contain loose material, then place it in a waste bag without shaking it through the air. Lightly dampen stuck droppings with warm water and allow about 5 minutes for softening before lifting them away, which reduces airborne dust and makes the remaining washing easier. Inspect bars, welds, hinges, doors, and tray runners for rust, sharp edges, bent sections, peeling finishes, or gaps that could trap a head, foot, or wing. Check accessories for loose fasteners, cracked plastic, splintered wood, exposed metal cores, and frayed rope, removing anything unsafe rather than attempting to hide damage beneath a quick wipe. Do not scrape cage coatings with steel wool, wire brushes, or sharp blades, because damaged finishes can expose underlying metal and create rough surfaces that retain grime.
- Photograph the setup before dismantling
- Check the liner and food intake for unusual changes
- Bag waste without shaking or dry brushing
- Inspect cage coatings, latches, and accessory fasteners
- Set damaged items aside for replacement
Good to know: Dropping changes alone do not establish a diagnosis. Contact an avian veterinarian if changes persist or occur alongside poor appetite or lethargy; visible blood warrants prompt veterinary advice.
- 4
Wash the cage from top to bottom
Prepare warm water with a small amount of mild, fragrance-free dish detergent, following its directions and using only enough to loosen dirt without creating excessive suds that are difficult to rinse away. Starting at the top, scrub the bars, crosspieces, door frames, and corners before working down to the grate, tray, base, and stand so dirty water does not run over already-clean lower sections. Keep stubborn deposits wet for about 5–10 minutes, then use a soft nylon brush or nonabrasive pad rather than applying extra force that could scratch the finish. Pay particular attention to the undersides of horizontal bars, bowl brackets, latch recesses, and tray channels, where food paste and droppings often remain hidden after a superficial wipe. Wash removable trays and grates in a dedicated basin or suitable utility sink, protecting your back by working at a comfortable height instead of bending over a large cage on the floor. Rinse away detergent and loosened debris with clean water, inspecting corners and joints until there is no visible grime or slippery soap film. Avoid pressure washers and aggressive jet settings, which can spread contaminated droplets and force water into hollow components that are difficult to dry.
Good to know: Physical cleaning must come before disinfecting. Droppings, food residue, and other organic material can shield microbes and interfere with a disinfectant’s effectiveness.
- 5
Clean bowls, perches, and toys by material
Wash food and water bowls separately from heavily soiled trays, scrubbing rims, seams, and mounting hardware with detergent and warm water before rinsing thoroughly; bowls still need washing daily even when the rest of the cage receives a weekly deep clean. For manufacturer-approved dishwasher-safe stainless-steel or ceramic bowls, use the recommended cycle and allow them to dry completely, while discarding chipped ceramic, cracked plastic, or damaged metal dishes that can injure your bird or trap residue. Scrub sound natural-wood perches with a dedicated brush and a little mild detergent, rinse thoroughly, and let them dry all the way through, rotating in a clean spare when a thick perch needs longer than the cage itself. Replace wood that remains heavily contaminated, cracked, moldy, or impossible to clean adequately, because porous materials cannot be treated as reliably as smooth, nonporous surfaces. Check rope accessories along their full length and around attachment points, replacing them if strands are loose, loops could catch toes, or the bird is chewing and swallowing fibers. Discard wet or soiled cardboard, paper, and other disposable foraging materials rather than soaking and reusing them, and clean washable plastic or metal toys according to their manufacturer’s instructions. Do not assume boiling, baking, steam treatment, or chemical soaking is safe for every accessory, since heat can damage adhesives and finishes while porous materials may retain cleaning chemicals.
- Bowls: scrub rims, seams, and brackets
- Wood: rinse well and allow extended drying
- Rope: inspect for loose strands and trapping loops
- Paper and cardboard: replace when wet or soiled
- Toys: follow material-specific cleaning instructions
Good to know: Keep at least one spare set of bowls and several suitable perches. Swapping in dry, clean items prevents you from rushing drying time to get the cage back into service.
- 6
Disinfect suitable surfaces safely
After washing and rinsing, disinfect compatible, nonporous cage surfaces with a product specifically suitable for animal housing and recommended by your avian veterinarian, particularly when contamination or illness makes disinfection important. Dilute concentrates exactly as their labels direct, using a dedicated measuring tool, and never strengthen a solution because the cage seems especially dirty. Apply the product using the label-approved method, minimizing airborne mist and keeping your bird out of the cleaning area throughout application, rinsing, drying, and ventilation. Keep every treated surface visibly wet for the full stated contact time, setting a timer for the label’s specified duration rather than assuming a quick spray and immediate wipe will work. Follow the product’s rinsing directions and veterinary guidance for surfaces your bird may climb or chew, choosing a product explicitly appropriate for that use rather than assuming a no-rinse floor cleaner is suitable for cage bars. Do not treat vinegar, baking soda, or a pleasant “natural” fragrance as proof of effective disinfection, and avoid applying disinfectants to porous toys unless the label specifically permits that material and use. If a bird is accidentally exposed to cleaning fumes or chemicals, stop immediately, move it to clean air without exposing yourself, and contact an avian veterinarian or animal poison service for product-specific advice; breathing distress requires emergency care.
- Confirm animal-housing use and surface compatibility
- Measure the dilution exactly
- Time the full wet-contact period
- Complete any required rinsing
- Keep the bird away until the area is safe
Good to know: There is no universal disinfectant dilution or contact time that fits every product. If the label or bird-safety guidance is unclear, do not improvise—ask your avian veterinarian before use.
- 7
Clean the surrounding area and dry everything
While the washed cage components dry, collect feathers, seed hulls, and dropped food from the cage stand, nearby furniture, wall splash areas, and floor using a damp cloth or mop rather than dry sweeping. A well-maintained HEPA-filter vacuum can help collect remaining dry debris after your bird has been moved elsewhere, but it should not replace damp removal of stuck droppings or wet food. Work outward from the cage footprint, checking underneath the stand and along baseboards where seed accumulation can attract pests and develop unpleasant odors. If you used a bathtub, utility sink, or other shared washing area, clean it afterward and store brushes where they can dry fully instead of leaving them in a bucket of dirty water. Towel-dry compatible metal and plastic components with a clean, lint-free cloth, then allow additional air-drying time until joints, tray channels, and attachment points are dry. Do not use heated appliances, high heat, or direct blasts from a fan to rush the process, because these methods can damage materials, disperse residue, or create unnecessary hazards. If a sour smell, tacky film, visible residue, or strong chemical odor remains, troubleshoot by identifying the affected part, repeating the appropriate washing or rinsing step, and extending ventilation rather than masking the problem with fragrance.
Good to know: A cage can look dry while water remains trapped in seams or hollow parts. Check hidden areas carefully, and remember that a lack of odor alone does not prove a cleaning product has been safely removed.
- 8
Reassemble and inspect the clean cage
Line the dry bottom tray with plain paper or unprinted paper towels, cut to fit without bulky folds, and position the liner beneath the grate if your cage is designed that way. Avoid corn-cob bedding, walnut-shell litter, scented substrates, and loose dusty material, which can hide changes in droppings and introduce ingestion or hygiene problems. Reinstall the grate, tray, doors, and accessories securely, checking each latch and fastening by hand before your bird has access. Return familiar resting perches to useful positions and keep food and water bowls out from directly beneath perches so droppings are less likely to contaminate them. Maintain enough unobstructed space for your bird to move and stretch normally, placing toys so they do not block access to dishes, crowd a doorway, or create trapping gaps. Fill clean dishes with fresh food and water, replace foraging materials with dry supplies, and confirm that no brushes, cloth fibers, cleaner containers, or loose hardware remain inside. Perform one final check for moisture, residue, sharp edges, and secure fittings, then return your bird calmly once the cage and surrounding room are fully ready.
- Dry paper liner installed correctly
- Tray, grate, doors, and latches secured
- Food and water protected from overhead droppings
- Perches and toys firmly attached
- No damp parts, residue, or cleaning tools left behind
Good to know: For birds with limited mobility or poor vision, preserve the familiar arrangement unless your veterinarian recommends a change. A clean cage should still be easy for its occupant to navigate.
- 9
Monitor your bird and maintain the routine
Watch your bird for the first 15–30 minutes after it returns, making sure it can reach its bowls, use its usual perches, and move around without slipping or becoming entangled. Confirm that it resumes normal behavior and eating, recognizing that a brief inspection of rearranged objects can be normal but persistent distress or avoidance of a bowl needs attention. Seek urgent veterinary care for open-mouth breathing at rest, pronounced tail bobbing with breathing, collapse, or sudden weakness, especially after possible cleaner exposure, and do not wait to see whether the next cage clean fixes the problem. Between weekly sessions, change the paper liner daily, wash food and water dishes daily and whenever soiled, spot-clean fresh droppings, and remove perishable food within about 2 hours—or sooner in hot conditions or as directed for the food. If the cage becomes heavily soiled before the next scheduled clean, increase cleaning frequency and review bowl placement, cage crowding, bathing splashes, and the number of birds rather than adding stronger chemicals. Keep a simple weekly reminder and note recurring damage, unusual droppings, or accessories that take too long to dry so you can buy replacements or discuss patterns with your avian veterinarian. Consistent cleaning of a bird cage should leave the enclosure dry, structurally sound, and easy to monitor, with a predictable routine that protects your bird without exposing it to unnecessary fumes or disruption.
Good to know: Persistent cage odor despite thorough cleaning deserves investigation, not an air freshener. Check hidden food deposits and damp accessories, and contact your veterinarian if the odor accompanies changes in your bird’s health or droppings.



Ask about this guide
Leave a comment or a question about your own pet and the Pawlito assistant replies right away with practical next steps.