How to Clip a Bird's Nails Safely at Home
Make clipping bird nails safer with expert guidance on tools, gentle handling, tiny trims, bleeding control, and when to call an avian vet.
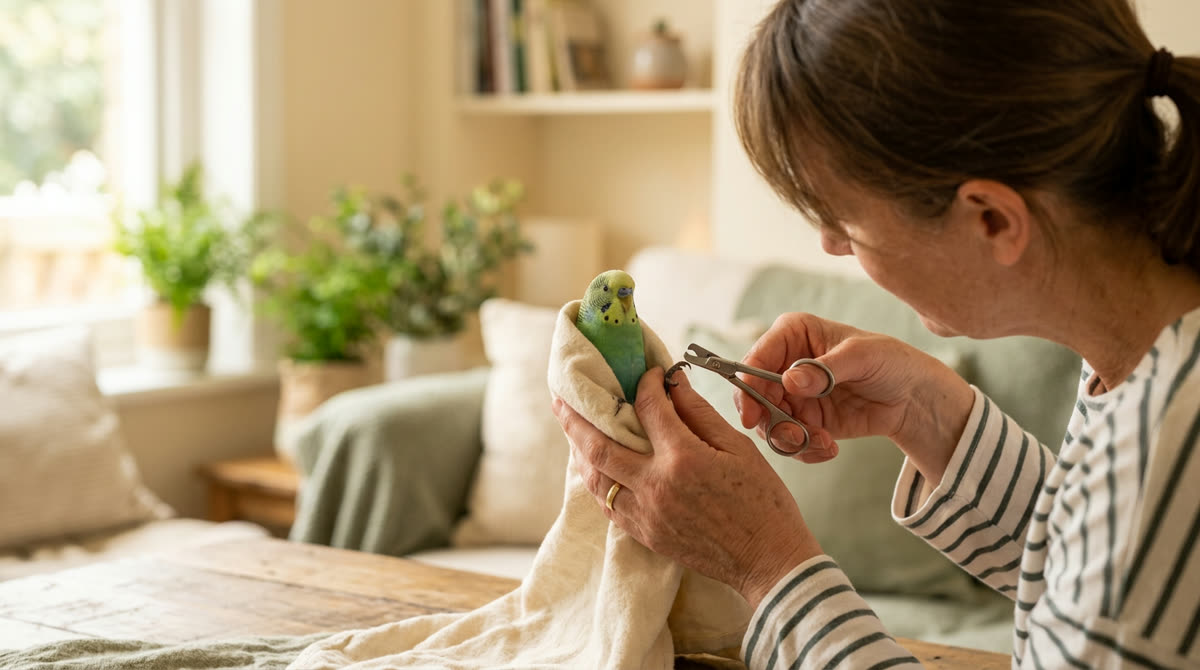
A calm, safety-first approachThis guide provides general education. Contact your veterinarian when symptoms are painful, persistent, or unusual.
- 1
Decide whether your bird needs a nail trim
Before clipping bird nails at home, assess how your bird stands, climbs, and grips familiar perches rather than judging nail length alone. Bird nails normally have curved, sharp tips, so a pointed nail or an occasional scratch on your hand does not automatically mean trimming is necessary. Nails that repeatedly snag fabric, curl toward the foot, or interfere with normal toe placement deserve assessment by an avian veterinarian. Watch your bird move for 2–3 minutes and, if possible, take clear photographs of both feet while it stands naturally on a perch. A suddenly altered nail, swollen toe, sore foot, broken nail, or change in grip calls for a veterinary examination rather than a home grooming session. If this is your first trim, arrange an in-person demonstration with an avian veterinarian or an experienced veterinary technician, especially for tiny birds or birds with dark nails. Birds that are unwell, unusually weak, breathing abnormally, or highly distressed by handling should not undergo an elective nail trim at home.
- Check whether nails catch repeatedly during normal activity.
- Look for comfortable, balanced toe placement.
- Compare both feet for swelling, injury, or changed grip.
- Arrange professional instruction before your first attempt.
Good to know: Do not aim for blunt, flat nails: birds need some natural curve and point to climb and hold their perches securely.
- 2
Gather bird-appropriate tools and emergency supplies
Choose a sharp, correctly sized nail clipper recommended for your bird by an avian professional; small nail scissors may suit some small birds, while larger parrots need a sturdier tool matched to their nail thickness. A clipper that is too large can hide the cutting point, while dull blades may squeeze, split, or crush the nail instead of making a clean cut. Place the clipper, a lightweight smooth towel, a bright adjustable lamp, clean gauze, and a nail-bleeding product specifically labeled for birds within easy reach before handling begins. Keep a small amount of plain cornstarch available as a backup for minor nail-tip bleeding, but recognize that it is not a substitute for urgent veterinary care when bleeding continues. Check the bleeding product's instructions beforehand, including where it may be applied, and never plan to put nail styptic in the eyes, mouth, nostrils, or an open skin wound. Clean and thoroughly dry the cutting blades according to the manufacturer's directions, and avoid electric grinders unless you have received specific training because noise, heat, and moving parts introduce additional risks. Save your avian veterinarian's number and identify an emergency clinic that treats birds, since looking for help while holding a bleeding bird wastes valuable time.
- Sharp clipper sized for your bird's nails.
- Bright lamp and lightweight, snag-free towel.
- Clean gauze and bird-labeled nail styptic.
- Backup cornstarch in a small, stable container.
- Avian veterinary contact and ready-to-use carrier.
Good to know: Keep loose powders away from your bird's face and apply only a tiny amount directly to a bleeding nail tip; birds can inhale airborne dust.
- 3
Prepare a quiet, escape-proof workspace
Use a small, quiet room where doors and windows can be closed, ceiling fans switched off, and other pets kept outside. Cover mirrors or large clear windows if your bird could fly into them, and remove open water, hot drinks, and anything it might land on or knock over. Set up at a stable table with a clean towel covering the surface so dropped tools stay put and there are no loose threads to catch the toes. Position your lamp before bringing your bird over, with enough light to see individual nail edges without shining directly into its eyes or producing uncomfortable heat. Choose a time when your bird is normally calm and alert, not immediately after vigorous flight, a fright, or an exhausting training session. Keep its normal feeding routine rather than withholding food, and reserve a few tiny pieces of a familiar favorite treat for cooperation. If a second person will help, agree in advance that one person handles the bird and monitors breathing while the other operates the clipper, with either person able to end the session immediately.
Good to know: Have everything ready before your bird enters the workspace; leaving a restrained bird to search for supplies makes the session longer and less safe.
- 4
Practice cooperative foot handling first
The safest home bird nail trim is often one performed voluntarily, so practice foot handling before attempting any cutting. Over several days or longer, use 1–3 minute sessions to reward your bird for remaining relaxed while you show the clipper, briefly touch a toe, and then withdraw your hand. Break the task into small stages, progressing only when your bird accepts the previous stage without pulling away, freezing, lunging, or trying to escape. Some trained parrots will present a foot while perched, allowing a familiar handler to support one toe and reach the nail tip without wrapping the bird. Do not assume that a bird that steps onto your hand will tolerate someone gripping its foot, because stepping up and accepting restraint are different skills. If your bird repeatedly snatches its foot away or bites at the equipment, stop rather than trying to time a cut between movements. Cooperative care may take weeks to establish, and a professional trim is the safer bridge if nail length is already affecting movement.
Good to know: Reward a calm touch or a look at the clipper even when no nail is cut; practice should build trust rather than predict an unavoidable struggle.
- 5
Use only safe, familiar restraint
If your bird cannot stay still voluntarily, attempt towel restraint only after an avian professional has shown you a technique appropriate for its size and species. Birds need movement of the breastbone and body wall to breathe, so never squeeze the chest, tightly wrap the torso, or press the bird against your body to stop struggling. Use a lightweight towel without loops or loose threads, keep the nostrils unobstructed, and follow the demonstrated hold without improvising grips around the neck or limbs. Support the bird securely in a natural position, never suspend it by a foot or wing, and do not turn it upside down as a shortcut. For a two-person trim, the trained handler should manage restraint and continuously watch breathing while the trimmer gently supports only the toe being worked on without twisting it. Keep any necessary restraint as brief as possible, release the bird if struggling escalates, and do not repeatedly recapture it to finish the remaining nails. Stop immediately for open-mouth breathing, pronounced tail movement with each breath, weakness, or reduced responsiveness, and contact an avian veterinarian urgently if breathing changes persist after release or the bird appears seriously unwell.
- Use only a restraint technique you have been shown.
- Keep the chest free to move and nostrils clear.
- Never suspend the bird by a limb.
- Assign one person to watch breathing continuously.
Good to know: If safe restraint requires more force than you expected, the session is over; a professional appointment is safer than tightening your grip.
- 6
Identify the quick and choose a tiny cutting point
Examine each nail individually under bright light, because the quick—the living tissue containing blood vessels and nerves—can extend different distances in different nails. In pale or translucent nails, it may appear as a pink or darker central area, but lighting does not always make its boundary reliably visible. Choose a cutting point only when you can clearly identify a small amount of nonliving tip well beyond that boundary, leaving a generous buffer rather than cutting close to the quick. For a routine home touch-up, this usually means removing only the extreme needlelike hook, often a fraction of a millimeter, but no measurement is automatically safe for every bird. In dark or opaque nails, do not assume that a flashlight, the nail's curve, or comparison with another toe tells you where the quick ends; if you cannot confidently select a safe tip, have an avian professional perform the trim. Long-standing overgrowth can include an elongated quick, so trying to restore a short nail in one sitting may cause pain and significant bleeding. Ask your veterinarian to plan staged trimming when nails are markedly overgrown, and never use bleeding or your bird's reaction as a way to locate the quick.
Good to know: When you are uncertain, leave the nail longer: taking off too little is usually easy to address later, while cutting living tissue creates an immediate problem.
- 7
Clip one stable nail tip at a time
Support a single toe gently in its natural position and place the open clipper around only the tiny tip you have already judged safe to remove. Before closing the blades, confirm that the toe pad, neighboring toes, feathers, and towel are completely clear of the cutting area. Make one clean, controlled cut across the tip without twisting the tool, pulling the toe, or following a moving foot with the blades. If your bird shifts before the cut, open and withdraw the clipper, then reassess rather than trying to finish quickly. Release the toe and inspect the nail immediately for blood, cracks, or a rough edge, while also checking your bird's breathing and comfort. Start with just one nail during an early session and complete additional nails only while your bird remains calm; there is no requirement to trim every nail on the same day or to trim nails that do not need it. If an otherwise safe tip has a tiny snag, a few gentle strokes with a fine hand file may smooth it when tolerated, but stop for splitting, pain, or resistance and seek veterinary advice for a damaged nail.
- Confirm the intended cut before closing the blades.
- Keep nearby toes and towel outside the clipper.
- Withdraw the tool whenever the foot moves.
- Inspect after every cut rather than after the whole foot.
Good to know: Do not chase matching nail lengths across the foot; different toes and individual nails may need different amounts of trimming, or none at all.
- 8
Stop and control any bleeding promptly
If a nail bleeds, stop clipping immediately and keep the bird as calm as possible while a helper brings the supplies already laid out. For a small nail-tip bleed, apply gentle, continuous pressure directly to the nail end with clean gauze for 1–2 minutes, without repeatedly lifting it to check and disrupting the forming clot. Use a tiny amount of bird-labeled nail styptic according to its directions if needed, or plain cornstarch as a temporary backup for minor bleeding, while avoiding the face and any surrounding skin wound. Maintain safe breathing throughout first aid, and do not keep struggling with restraint if you cannot control the bird safely. Contact an avian veterinarian urgently if bleeding has not stopped after 2–3 minutes of uninterrupted pressure, if it restarts, or if the nail is cracked deeply or partly torn off. Seek emergency help immediately for brisk bleeding, weakness, loss of balance, or abnormal breathing rather than waiting out that interval, because even a small-looking blood loss can matter in a tiny bird. Do not apply a tourniquet, pull off a damaged nail, use household glue, or give human pain medicine; once bleeding stops, end the grooming session and arrange veterinary advice about the injury.
- Stop trimming at the first sign of blood.
- Apply uninterrupted pressure to the nail tip.
- Escalate immediately for heavy bleeding or weakness.
- Seek urgent advice for persistent or renewed bleeding.
Good to know: If you are alone and bleeding is continuing, call the emergency clinic on speakerphone while providing pressure so you can get guidance without delaying care.
- 9
Check comfort and plan future nail care
Return your bird to a familiar, quiet enclosure with secure, easy-to-reach perches, and watch closely for 15–30 minutes to confirm normal breathing, balance, and use of both feet. Offer a small familiar reward and allow rest rather than immediately encouraging climbing, bathing, or vigorous play, particularly if a nail bled. Use clean white paper on the enclosure floor and check it, the perches, and the feet for fresh blood during the next several hours. Contact your avian veterinarian promptly for renewed bleeding, limping, persistent foot lifting, swelling, reduced grip, or reduced eating, and seek urgent care for weakness or breathing difficulty. Record the trim date and which tips were clipped, then assess nail function every 2–4 weeks instead of automatically trimming on a fixed schedule, because growth and natural wear vary widely. Provide appropriately sized, bird-safe natural wood perches with varied diameters and textures, but avoid sandpaper perch covers and abrasive surfaces used as the bird's main resting perch because they can injure the feet. At routine veterinary visits, review nail shape and trimming frequency, especially if growth changes, so future clipping of bird nails stays conservative, comfortable, and tailored to your bird.
- Observe balance and foot use for 15–30 minutes.
- Check white cage paper for fresh blood.
- Log the date and nails trimmed.
- Reassess nail function every 2–4 weeks.
Good to know: A good trim leaves your bird gripping and moving normally; soreness, slipping, or reluctance to perch is a reason to seek advice, not an expected result.



Ask about this guide
Leave a comment or a question about your own pet and the Pawlito assistant replies right away with practical next steps.