How to Stop a Bird From Biting Your Fingers
Reduce bird biting with gentle training, safer handling, and practical steps that help your bird feel comfortable around your fingers.
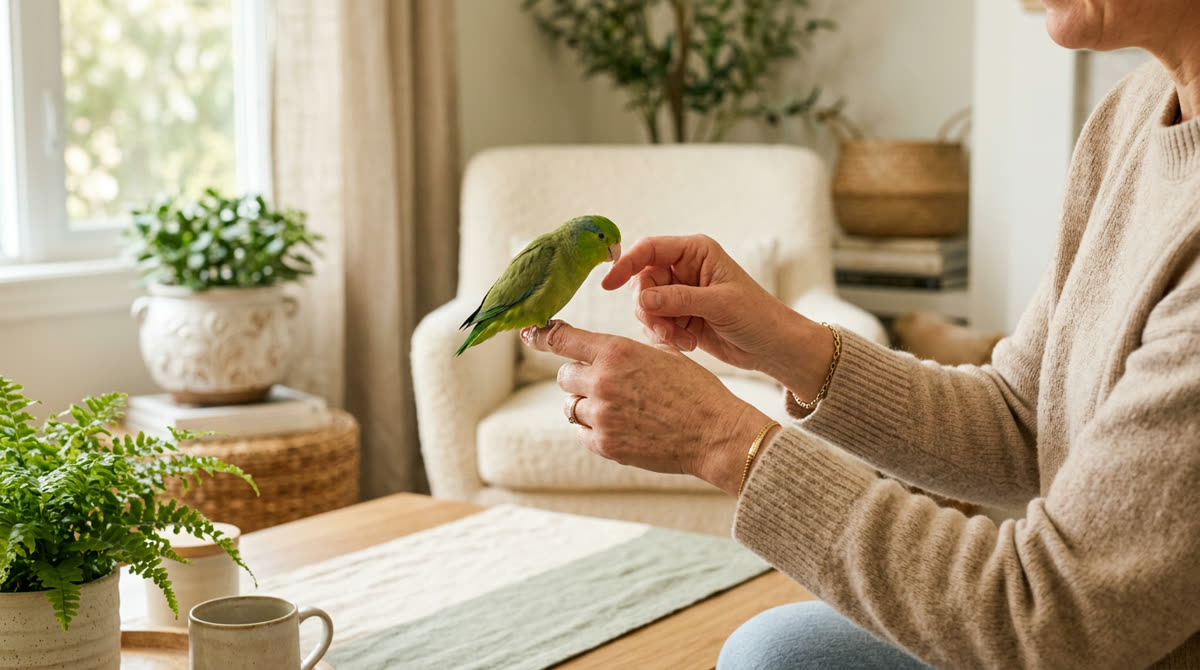
A calm, safety-first approachThis guide provides general education. Contact your veterinarian when symptoms are painful, persistent, or unusual.
- 1
Identify What Happens Before the Bite
To stop a bird from biting your fingers, first identify what the bird is trying to avoid or obtain rather than treating every bite as aggression. For 3 to 5 days, record what happened immediately before each incident, including where the bird was, who approached, what the hand did, and whether food or a favorite person was nearby. Note whether biting happens during cage entry, step-up requests, petting, or the return to the cage, because each situation calls for a different adjustment. A bird may gently investigate a stable finger with its beak for balance, but increasing pressure, stiff posture, or an attempt to move away means you should pause rather than insist. Do not deliberately repeat a situation to test whether the bird will bite; collect observations during necessary care and interactions the bird accepts. If biting starts suddenly, becomes unusually intense, or accompanies reduced appetite, abnormal droppings, reluctance to perch, fluffed inactivity, or sensitivity to touch, stop training and contact an avian veterinarian promptly. Trouble breathing, collapse, significant bleeding, or inability to perch requires urgent veterinary attention rather than behavior work.
- Record the time, location, and person involved.
- Describe the hand movement immediately before the bite.
- Note warnings such as leaning away or opening the beak.
- Track appetite, droppings, activity, and balance.
Good to know: A behavior log can reveal patterns, but it cannot rule out pain or illness; birds may hide early signs of being unwell.
- 2
Prepare a Low-Stress Training Area
Choose a quiet, familiar area with secure doors and windows, ceiling fans switched off, and other pets kept outside the room so the bird does not have to monitor threats while learning. Set up a stable training stand around your lower chest height, with a perch diameter appropriate for your bird's feet and a clear route to move away from your hand. Keep the bird off your shoulder during retraining, since you cannot easily read its posture there and a bite could injure your face. Prepare 10 to 15 tiny pieces of a familiar, bird-safe reward, such as a millet nibble for a budgie or a small fragment of a favorite nut for a larger parrot, using the smallest portion the bird values. Reserve these preferred morsels for practice when practical, but never withhold regular meals to make the bird cooperate or add enough treats to unbalance its diet. Begin with sessions lasting 1 to 3 minutes, once or twice daily, when the bird is alert and settled rather than sleepy, startled, or highly excited. Predictable meals, species-appropriate enrichment, and adequate uninterrupted sleep—often around 10 to 12 hours for many companion parrots—can reduce stress that makes bird biting more likely.
- Secure the room and turn off ceiling fans.
- Use a familiar stand with secure footing.
- Prepare tiny rewards and a small treat dish.
- Keep a suitable handheld perch within reach.
- Schedule practice away from busy household periods.
Good to know: Do not chase the bird out of its cage to begin a session; train where it already feels comfortable or wait for it to come out voluntarily.
- 3
Respect Early Warning Signals
Before presenting your fingers, watch the bird for 20 to 30 seconds and compare its posture with how it looks when relaxed in that same setting. Leaning away, freezing, tightening feathers, crouching defensively, opening the beak, or lunging can signal that your approach is unwelcome, although signals vary among species and individuals. Rapid pupil changes, often called eye pinning, can reflect excitement as well as agitation, so interpret them alongside the whole body rather than labeling them a guaranteed bite warning. Approach slowly from where the bird can see you, keep your fingers still, and stop at the first change suggesting discomfort instead of pushing until the bird reacts strongly. Increase the distance by a few inches, or more if needed, and resume only when the bird returns to a comfortable posture. If it walks away, allow that choice and offer a different activity rather than following it with your hand, because repeated pursuit teaches that subtle warnings do not work. For petting, offer a brief opportunity for head or neck contact only when the bird clearly solicits it, and pause after 2 to 3 seconds to see whether it asks for more.
Good to know: Avoid stroking the back, belly, or under the wings; these areas can be sexually stimulating for many parrots and may complicate handling problems.
- 4
Teach a Target Without Offering Fingers
Target training gives your bird a clear, rewarded action to perform without requiring direct contact with your fingers. Use a smooth, blunt target such as an untreated wooden chopstick, and hold its tip where the bird notices it but remains relaxed, whether that is 6 inches away or considerably farther. Choose a short marker word such as “yes,” say it calmly, and immediately place a tiny reward in a dish or offer it safely; repeat this pairing 5 to 10 times across brief sessions. Next, mark and reward a voluntary look or lean toward the target, gradually progressing to a gentle beak touch without poking the bird or pushing the stick against its face. Aim to deliver the reward within about 1 second of the marker so the bird can connect its action with the outcome. Once gentle touches are reliable, shift the target 1 to 2 inches to invite a small movement, keeping the task easy enough that the bird succeeds on most attempts. Finish after 3 to 5 successful repetitions, and if the bird backs away, attacks the target, or refuses normally valued food, increase distance or end the session rather than drilling through discomfort.
- Use a smooth target with no sharp tip.
- Pair one consistent marker with a reward.
- Reward looking before requiring a touch.
- Deliver food in a dish if fingers are unsafe.
Good to know: A marker predicts a reward; do not use it to distract the bird while sneaking a hand closer or performing something it dislikes.
- 5
Build a Voluntary Step-Up on a Perch
If fingers currently trigger biting, introduce a stable handheld perch as an intermediate transport option rather than repeatedly offering bare skin. Select a bird-safe perch with a comfortable grip diameter and enough length to keep your holding hand beyond easy reach, which may be roughly 12 to 18 inches for some small and medium birds but must be adjusted to the individual. Start with the perch resting nearby and reward calm observation before gradually bringing it closer over several sessions if necessary. When the bird accepts its presence, hold it steady just in front of the feet at a comfortable stepping height without pressing it into the chest or abdomen. Use the target to invite a small forward step, rewarding a weight shift, then one foot, and finally both feet as separate achievements when needed. Add a cue such as “step up” as the movement becomes predictable, then teach “step down” onto a familiar stand so getting onto the perch does not always mean losing freedom or returning to the cage. Never tip the bird off balance to force compliance, and stop if it retreats, grips its current perch tightly, or repeatedly reaches past the new perch to bite your hand.
Good to know: A perch is a valid long-term handling tool, not a training failure; powerful or persistent biters may need a customized setup from an experienced avian behavior professional.
- 6
Reintroduce Fingers in Small Increments
Begin direct hand work only after the bird is relaxed around you and can complete easy target or perch exercises without defensive behavior. Rest your hand outside its comfortable boundary—perhaps 12 to 24 inches away initially, or farther for a frightened bird—and mark and reward a relaxed glance toward it. After several comfortable repetitions, move the hand only 1 to 2 inches closer, changing either distance or duration at one time rather than making both harder together. Progress from tolerating a still hand to voluntarily approaching it, then to stepping onto a stable finger or hand appropriate to the bird's size. A finger may suit a small bird, while a larger parrot may need a broader hand or forearm platform; do not balance a heavy bird on an unstable fingertip. During initial step-ups, reward one foot if necessary, then both feet for just 1 second before inviting the bird back onto its stand, gradually building to 3 to 5 comfortable seconds. Offer the reward only where the bird remains willing to go, rather than luring it into uncomfortable contact, and return to an easier stage if it hesitates, stiffens, or reaches toward your skin with increasing pressure.
- Start farther away than the expected bite distance.
- Change only one training variable at a time.
- Keep the hand steady and appropriately supported.
- Reward brief contact before adding duration.
- Allow an easy return to the stand.
Good to know: Some birds never enjoy stepping onto bare hands, and that is acceptable; safe perch transfers and cooperative care are more important than finger contact.
- 7
Respond Safely When a Bite Happens
If your bird bites, prioritize a safe release rather than trying to prove that biting will never make your hand move. Avoid jerking, shaking the bird, yelling, hitting the beak, spraying water, or blowing into its face, since these reactions can cause injury or make hands more frightening. Keep the bitten hand as steady as you safely can, lower it toward a stable nearby perch or surface, and offer the bird a chance to step off without pushing into its body. If it maintains its grip, avoid prying the beak open or pulling hard against the bite; for a serious bite or a bird you cannot handle safely, seek professional guidance on an individualized handling plan. Once released, calmly create distance and end the interaction without chasing the bird into its cage as punishment. Wash broken skin promptly with soap and running water, use clean direct pressure for bleeding, and seek medical care for deep or gaping wounds, persistent bleeding, numbness, difficulty moving a finger, or signs of infection. Before the next session, identify the missed warning or difficult request and make that task easier, because preventing another rehearsal is more useful than punishing the bite afterward.
Good to know: Do not follow advice to “take the bite” or push your finger deeper into the beak; both can worsen injury and frighten the bird.
- 8
Adjust for the Specific Biting Trigger
When biting occurs mainly inside the cage, respect that space by inviting the bird to a doorway perch or familiar external stand before reaching in for nonurgent cleaning or rearranging. If hands near food bowls trigger lunging, use external-access dishes where available or teach the bird to wait on a designated perch while you service the cage. If returning to the cage predicts the end of all enjoyable contact, practice brief returns followed by a reward and occasional immediate release so entry does not always mean the fun is over. For birds that bite around a preferred person, have other adults begin with rewards at a safe distance rather than attempting hand transfers during highly excited interactions. If biting clusters around nesting behavior, remove access to dark hideaways such as fabric huts and boxes when these are inappropriate for the bird, avoid body stroking, and discuss reproductive concerns with an avian veterinarian. If the bird grabs treats and skin together, use a dish or a longer millet spray during training instead of repeatedly pinching tiny morsels near the beak. When progress stalls, check footing, room activity, session length, and reward value first, then reduce the difficulty rather than adding force, heavy gloves, or wing clipping as a behavior shortcut.
- Cage biting: invite movement before reaching inside.
- Bowl guarding: teach a separate waiting station.
- Return resistance: reward calm cage entry.
- Treat grabbing: switch to safer reward delivery.
- Seasonal changes: review nesting triggers and seek advice.
Good to know: Never remove necessary food, water, or veterinary care to avoid conflict; arrange safer access and get help when essential care cannot be completed safely.
- 9
Maintain Progress and Get Help Early
Track successful approaches, relaxed step-ups, and voluntary retreats alongside bite incidents, because fewer bites alone may simply mean the bird has stopped interacting. Continue one or two short daily sessions and look for easier body language and more willing participation over the next 1 to 2 weeks rather than expecting a fixed cure date. As a practical progression rule, wait until the bird succeeds comfortably on at least 4 out of 5 easy requests across several sessions before adding a new location, longer hold, or different handler. Ask every household member to use the same cues, respect retreat signals, and avoid shoulder access until handling is reliably safe, while keeping children out of direct handling during retraining. Once a skill is established, maintain it with brief practice and meaningful rewards, continuing to provide foraging opportunities, appropriate chewing materials, and predictable rest. Contact an avian veterinarian if behavior worsens, health changes appear, or biting prevents routine care, and seek a qualified reward-based avian behavior professional for repeated skin-breaking bites or no improvement after 2 to 4 weeks of consistent adjustments. The lasting goal in reducing bird biting is a bird that can communicate discomfort safely and choose cooperative handling, not a bird that tolerates fingers because its warnings are ignored.
Good to know: After a frightening event, illness, or household change, return to an easier training stage; temporary setbacks call for more predictability, not stricter handling.



Ask about this guide
Leave a comment or a question about your own pet and the Pawlito assistant replies right away with practical next steps.