How to Teach a Bird to Step Up on Your Hand
Teach your bird to step onto your hand willingly with short, reward-based sessions that build confidence without pressure or force.
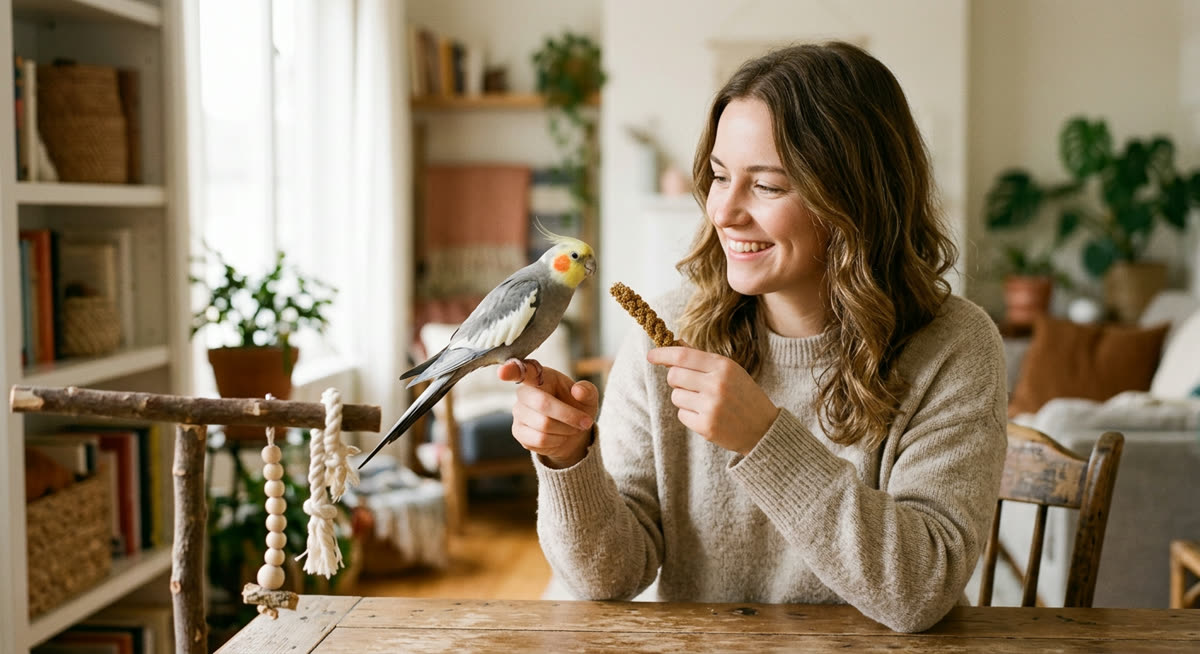
A calm, safety-first approachThis guide provides general education. Contact your veterinarian when symptoms are painful, persistent, or unusual.
- 1
1. Prepare a safe, quiet training space
Choose a quiet room where you can close the doors and windows, switch off ceiling fans and keep other pets outside. Cover large windows and mirrors so your bird is less likely to fly into them if startled. Set up a stable perch at a comfortable height, with enough space for your bird to turn around or move away from your hand. Begin at a familiar cage doorway or play stand rather than carrying an uncertain bird somewhere new. Keep hot drinks, open water, fumes and loose jewellery away from the training area. Allow plenty of time so you will not need to chase or grab your bird to finish the session.
- Doors and windows closed
- Fans switched off
- Other pets outside
- Stable, familiar perch
- Hazards removed
Good to know: Plan sessions when your bird is usually alert and relaxed, rather than sleepy or excited by household activity.
- 2
2. Check your bird's comfort and choose a reward
Watch your bird before approaching and look for relaxed movement, comfortable perching and interest in its surroundings. Postpone training if your bird is panting, repeatedly trying to escape, unusually quiet or showing a sudden change in behaviour, and contact your vet if you are concerned about its health. Offer a tiny piece of a familiar, bird-safe favourite food to find out what your bird is keen to work for. Use small portions from its normal daily food allowance where appropriate, and never withhold meals to make it cooperate. Choose a short marker word, such as 'yes', and say it immediately before giving a reward several times so it begins to predict something pleasant. Start with sessions lasting one to three minutes and finish sooner if your bird loses interest.
- Tiny, familiar food rewards
- One consistent marker word
- Fresh drinking water available
- A relaxed, interested bird
Good to know: Prepare the rewards before you approach so you can deliver each one promptly without rummaging in a packet.
- 3
3. Make your hand a reassuring presence
Position yourself beside the perch without leaning over your bird or blocking its route away. Rest your hand at a distance where your bird notices it but remains comfortable, then mark and reward calm behaviour. Deliver the reward with your other hand or place it in a familiar treat dish if taking food from fingers is still worrying. Across several brief sessions, bring the resting hand slightly closer only while your bird continues to stay relaxed. If your bird leans away, freezes, lunges or retreats, move your hand back and make the next attempt easier. Do not reach deep into the cage or follow your bird around with your hand, as this removes its choice to disengage.
Good to know: Keep your hand still while your bird investigates; moving fingers towards its feet can make a safe-looking perch suddenly seem unpredictable.
- 4
4. Offer a stable hand or a perch alternative
For a small bird, offer a steady index finger held horizontally; for a larger bird, offer a stable hand or forearm suited to its grip. Keep the stepping surface close to the existing perch and approximately level with, or just above, your bird's feet so it can step rather than jump. Approach slowly from the front and slightly to one side, where your bird can see the hand clearly. Leave a small gap and never push your finger into the breast or abdomen to force a loss of balance. If hands remain frightening, practise the same voluntary stepping process with a familiar handheld perch before returning to hand training. For a bird with a history of forceful biting, use a suitable perch to protect your hands and seek help from an avian vet or a qualified, reward-based bird behaviour professional.
- Steady finger, hand or forearm
- Short, comfortable stepping distance
- Clear view of your approach
- No pressure against the body
- Familiar perch available
- 5
5. Reward movement towards your hand
Hold a reward just beyond the offered hand so your bird can see it without having to stretch awkwardly. Initially, mark and reward a small movement towards the hand, such as looking at it, leaning forward or lifting a foot. Once those movements are comfortable, wait for a gentle foot touch and reward that before asking for anything more. If your bird stretches its neck towards the food while keeping both feet firmly planted, move the reward closer and return to an easier stage. Keep your supporting hand still and let your bird withdraw its foot whenever it wants. A bird may test a surface with its beak, so avoid startling it with a sudden movement, but pause and increase the distance if contact becomes forceful or its posture looks tense.
Good to know: If your bird already follows a target stick, use that familiar skill to invite a small movement towards the hand without touching or pushing it.
- 6
6. Build up to a complete step and add the cue
After your bird readily places one foot on your hand, position the reward so a small, balanced step will bring its second foot across. Mark the instant both feet are supported by your hand, then give the reward while keeping your hand still. Let your bird step straight back onto its perch if it chooses, rather than immediately lifting or carrying it away. When the complete movement becomes predictable, say 'step up' once just before offering your hand. Gradually fade the visible food lure by presenting an empty supporting hand and delivering the reward from your other hand after the step. If your bird hesitates, return to rewarding one foot or an approach instead of repeating the cue or moving the food farther away.
- Both feet supported
- Hand held steady
- Reward delivered promptly
- Cue spoken once
- Easy return to the perch
Good to know: Introduce the verbal cue only when success is likely, so 'step up' becomes associated with a clear, comfortable action.
- 7
7. Practise staying briefly and stepping down
Once your bird steps up willingly, reward it for remaining on your stationary hand for one second before offering the perch again. Increase that pause gradually, working towards a few relaxed seconds rather than a prolonged hold. To teach stepping down, bring your hand close to a stable perch with the perch level with or slightly above your bird's feet. Say 'step down' as you offer the perch, allow your bird to move across and reward it once it is securely perched. Introduce hand movement separately by moving only a few centimetres at first and returning to the starting position before rewarding calm balance. Keep early transport low over a safe surface, avoid shoulder access during practice and never restrain your bird's toes to stop it leaving.
- 8
8. Troubleshoot refusal, fear or biting
If your bird refuses, check whether your hand is unsteady, the gap is too wide, the room is distracting or the reward has lost its appeal. Lower the difficulty by rewarding a calm approach, offering a familiar perch or ending the session for a break. Treat leaning away, an open-beak warning, lunging or repeated escape attempts as reasons to stop advancing, not challenges to overcome. If your bird bites while on your hand, avoid shaking or flinging it and calmly offer the nearest stable perch so it can step off safely. Never shout, tap the beak, spray water or force another attempt, because punishment can make hands more threatening. Stop training and contact your avian vet if reluctance appears suddenly or comes with limping, reduced grip, breathing changes, appetite changes or unusual lethargy.
- Reduce the distance or difficulty
- Check hand stability
- Respect warning signals
- Avoid punishment
- Ask your vet about sudden changes
Good to know: Note what happened immediately before a refusal or bite so you can adjust that part of the next session.
- 9
9. Finish positively and build a reliable routine
End after an easy success while your bird is still comfortable, even if that success is simply approaching your hand. Offer its familiar perch, check that it is securely settled and leave fresh water and normal food available. Practise once or twice daily when your bird is receptive, allowing several days or weeks for progress rather than expecting a fixed timetable. Once the skill is comfortable, change only one detail at a time, such as your position, the perch or the quiet room used for practice. Have other household members begin with easy, rewarded approaches instead of assuming your bird will immediately step onto every hand. Continue rewarding willing cooperation, and regularly make stepping up lead to something pleasant rather than always ending play or returning your bird to its cage.
Good to know: Keep a brief record of the easiest successful stage so each new session starts with something your bird already understands.



Ask about this guide
Leave a comment or a question about your own pet and the Pawlito assistant replies right away with practical next steps.